I recently purchased an iPhone 6 plus and am in need of more lightning cables. The certified lightning cables are expensive, so I was looking for a good noncertified lightning cable. I then found a combo set which includes a 3 in 1 cable and a 8000 mAh external battery for only about $14. This sounds like a very good deal. I ordered it because of the good reviews.
When the package arrived, I was pleasantly surprised that the build quality of the  battery and cable is very good. It also came in a handsome box. The package seems like it costs a lot more than its cost.
The problem occurred when I used the cable to connect my iPhone to my MacBook Pro. The moment I connected them, I saw a message on my iPhone saying that the cable is not certified and it might not work properly. I also noticed that my MacBook Pro turned off automatically without any warning. After that, I was not able to turn my MacBook Pro on any more. The charger flashed orange light and if I pressed the battery check button, there is no light or anything. It’s like there is no batter in the system.
I first thought my MacBook Pro is done for and I needed a trip to Apple Store. From my past experience, it could take days before I get my computer back. I decided to try fixing it myself. There is a thread in Apple’s support forum and this seems like a common problem. Someone suggested that disconnecting and reconnecting the battery connector might fix the problem. So, I opened up my MacBook Pro, disconnected the battery connector and reconnected it again. Guess what, it did fix the problem! If you have not opened up a MacBook Pro before, here are some pictures to help you.
My MacBook Pro is a Mid 2012 model. If you have a different model, there is a great web site for dis-assembly videos.
http://ifixit.com
First, place your MacBook Pro upside down on a flat surface. Use a fine Phillips screw driver to unscrew the 10 screws.

I used a size PH 000 screw driver from this set. Note that the 10 screws are not of the same size, it’s recommended that you write down the location of each screw. Carefully remove the bottom part.
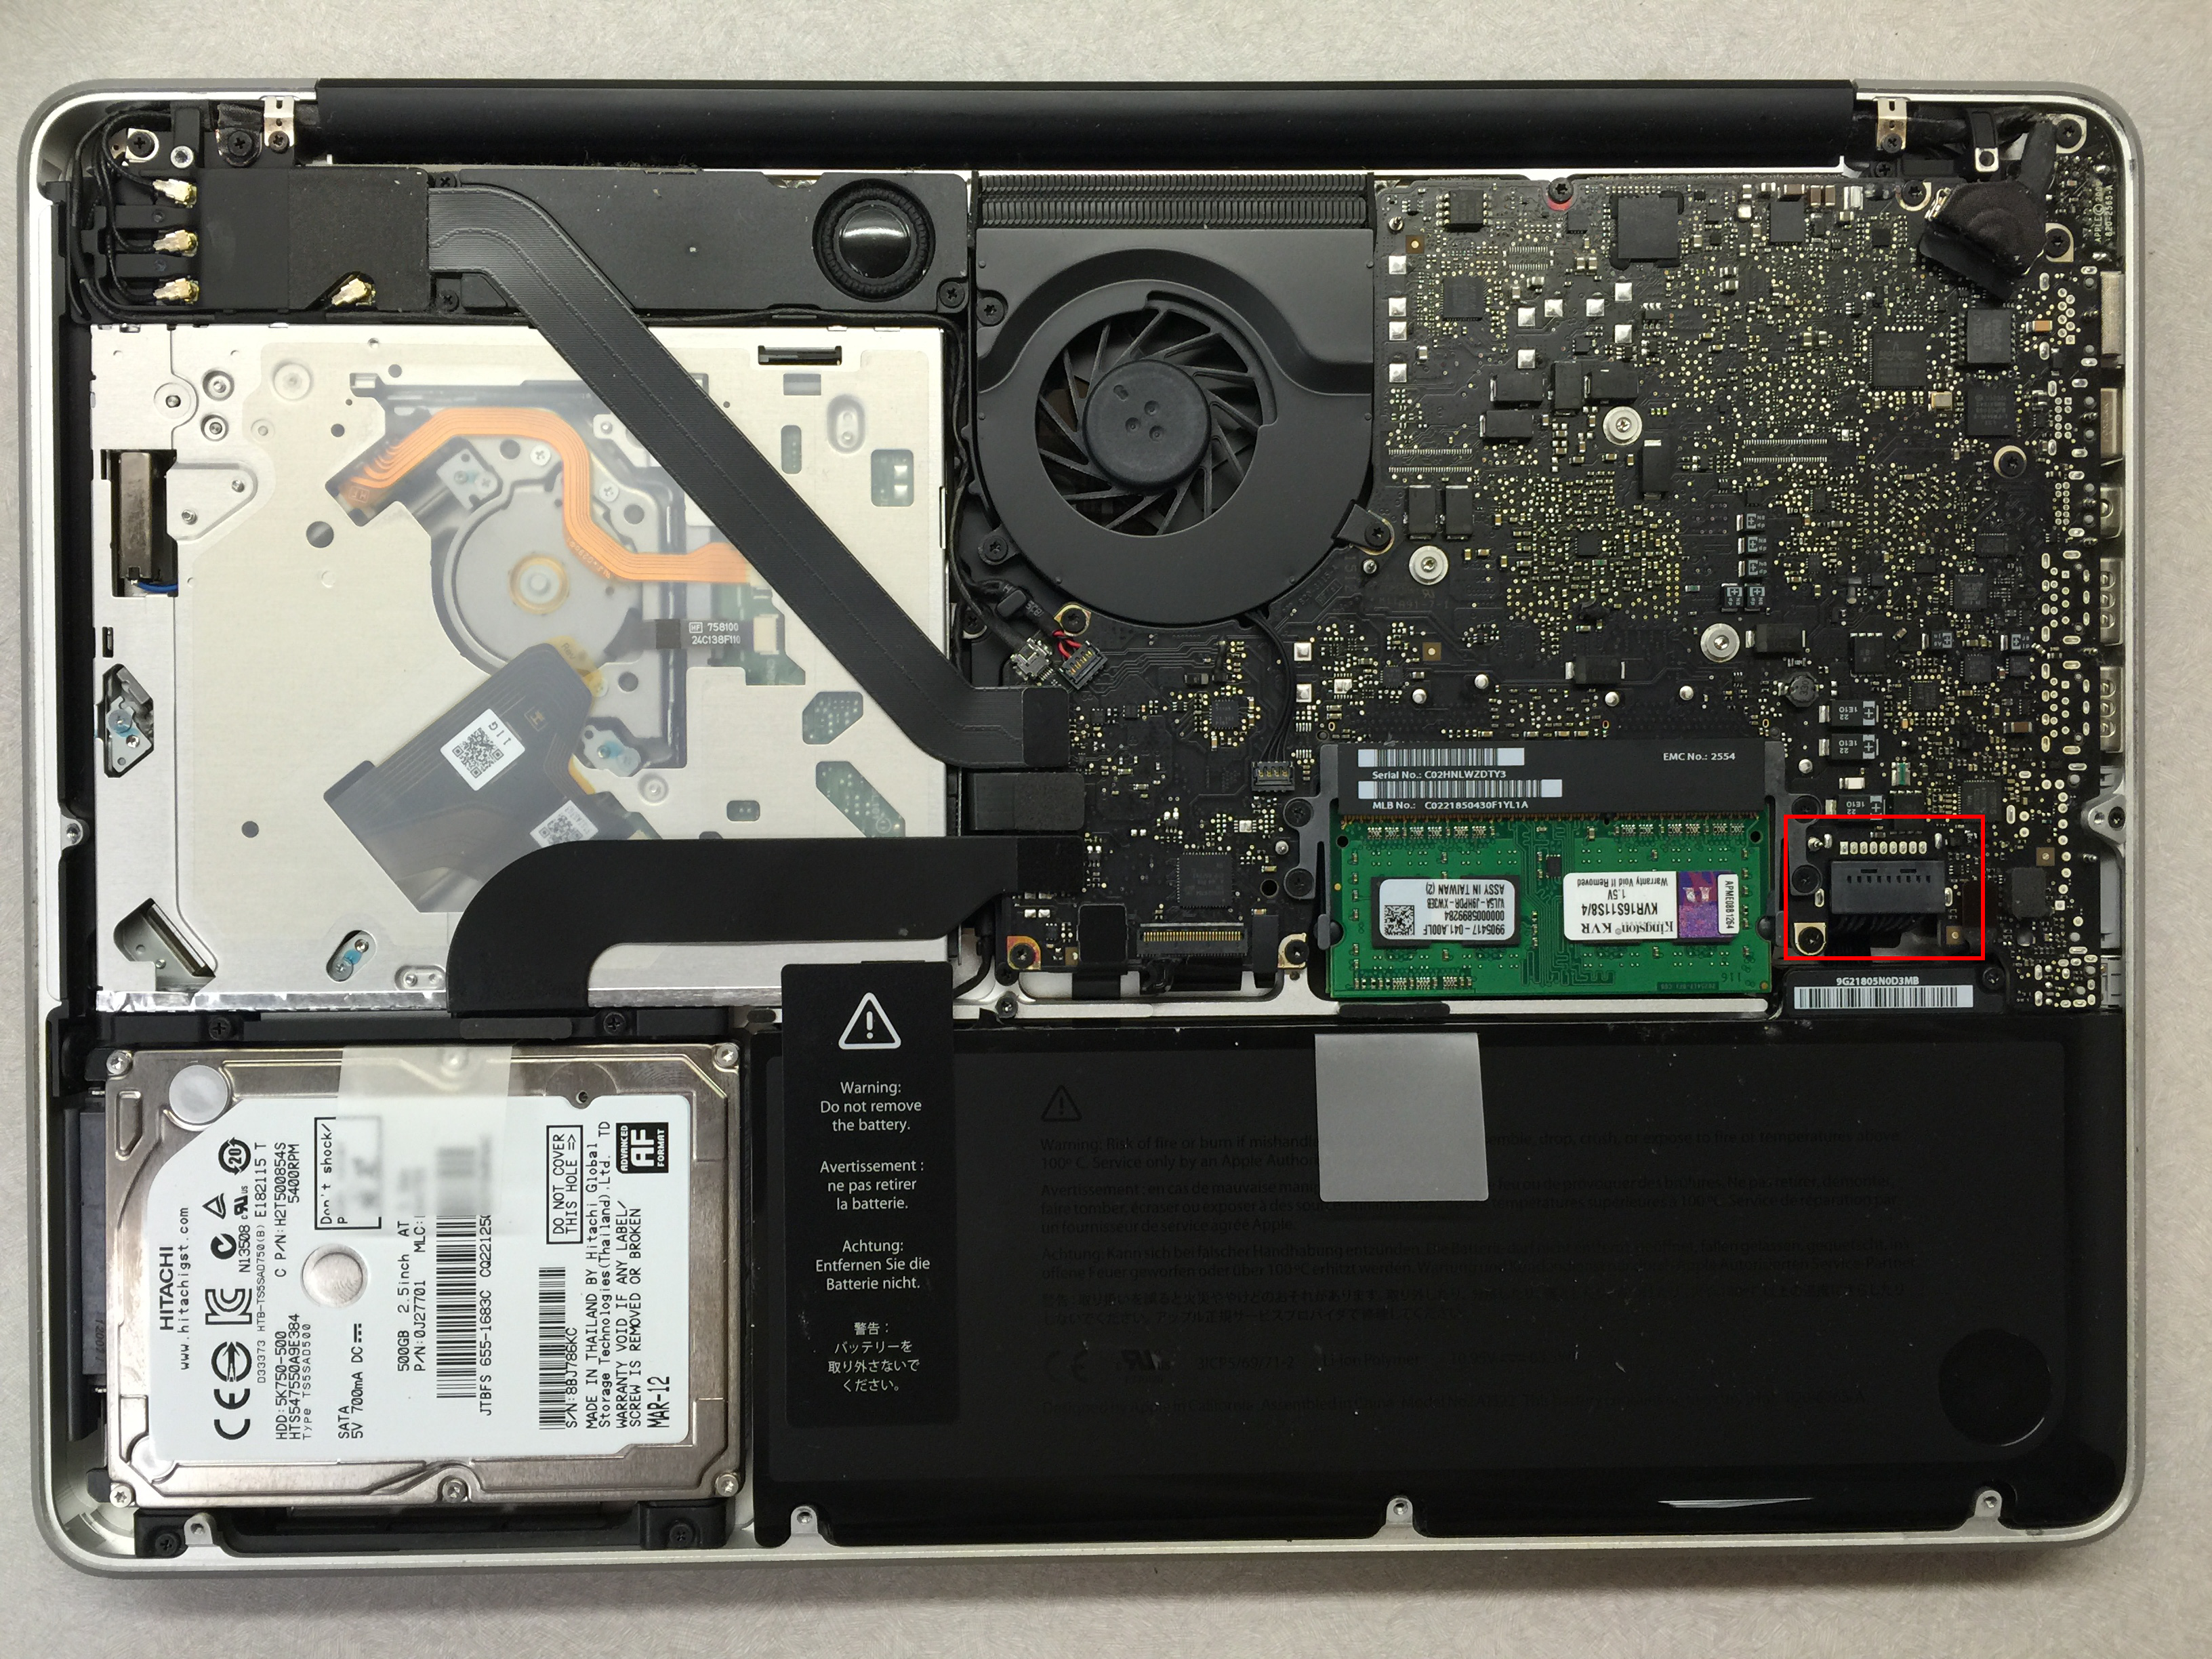
Gently pull out the battery connector, wait for a few seconds and reconnect it again. Do not remove the battery, it would void your warranty. That’s it. Before you put the bottom cover back, you can try to push the battery check button on the side to make sure the computer does recognize the battery now.
This post may contain affiliated links. When you click on the link and purchase a product, we receive a small commision to keep us running. Thanks.
Leave a Reply