
AI image editing has grown far beyond filters and quick touch-ups. With Qwen-Image-Edit, you can take any photo and use natural-language prompts to turn it into ad-ready visuals, lifestyle shots, or even concept art. Running the model locally in ComfyUI with a GGUF build makes the process accessible on lower-power GPUs. That means you get precise control without depending on cloud services. [Update: The new Qwen-Image-Edit-2509 is out. Please see this article.]
If you’re thinking about purchasing a new GPU, we’d greatly appreciate it if you used our Amazon Associate links. The price you pay will be exactly the same, but Amazon provides us with a small commission for each purchase. It’s a simple way to support our site and helps us keep creating useful content for you. Recommended GPUs: RTX 5090, RTX 5080, and RTX 5070. #ad
In this guide, I’ll show you how to set up Qwen-Image-Edit inside ComfyUI, load a GGUF model, and start experimenting with prompts that turn a simple image into polished, professional content.
Qwen-Image-Edit Models
- GGUF Models: You can find the GGUF models here. You only need one model. I have a RTX 5090, and I use the Q8 variant. I downloaded Qwen_Image_Edit-Q8_0.gguf. If your GPU has less VRAM, consider the Q5 or Q4 variants. Put the GGUF model in ComfyUI\models\unet\ .
- Text Encoder: Download qwen_2.5_vl_7b_fp8_scaled.safetensors and put it in ComfyUI\models\text_encoders\ .
- VAE: Download qwen_image_vae.safetensors and put it in ComfyUI\models\vae\ .
- LoRA(optional): If you want to try the 4 steps LoRA, download Qwen-Image-Lightning-4steps-V1.0.safetensors and put it in ComfyUI\models\loras\ .
Qwen-Image-Edit GGUF Workflow Installation
- Update your ComfyUI to the latest version if you haven’t already. (Run update\update_comfyui.bat for Windows). Depending on which gguf custom node you installed before, you also need to update the ComfyUI-GGUF or gguf custom node to the latest version if you have not updated it recently.
- Download the json file, and open it using ComfyUI.
- Use ComfyUI Manager to install missing nodes.
- Restart ComfyUI.
Nodes
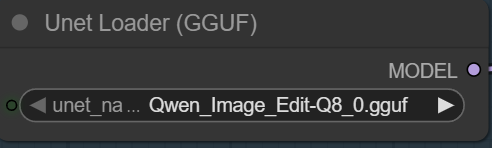
Select the GGUF model here.
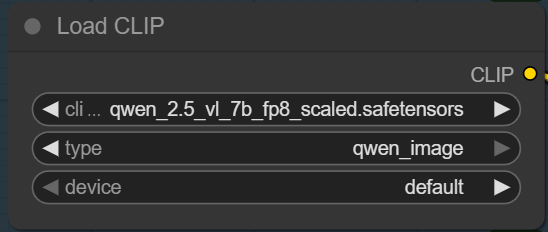
Specify the text encoder here.
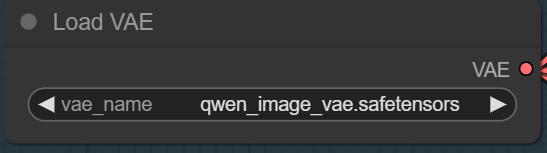
Select the VAE here.
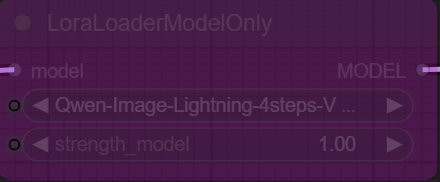
If you want to try the 4 steps LoRA, select this node and press Ctl+B to enable it. Select the LoRA here.
Upload an image to edit here.
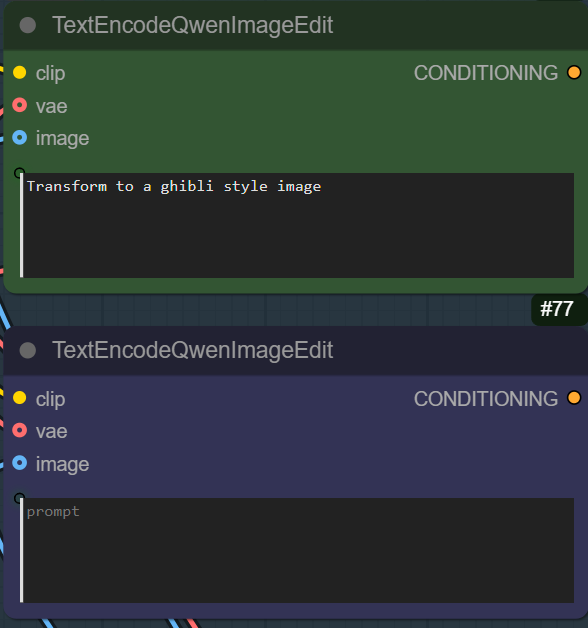
Enter positive prompt on the top node and enter negative prompt on the bottom node.
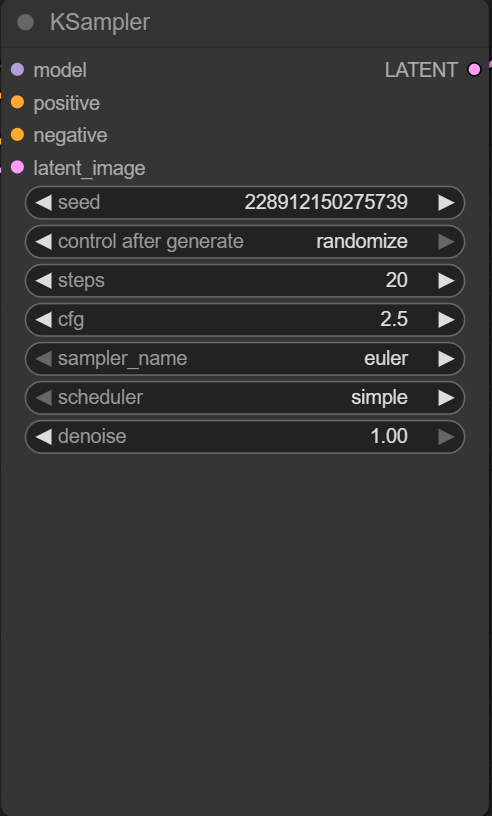
Important: If you enable the 4 steps LoRA, change the steps to 4 and change the cfg to 1.
Qwen-Image-Edit Examples
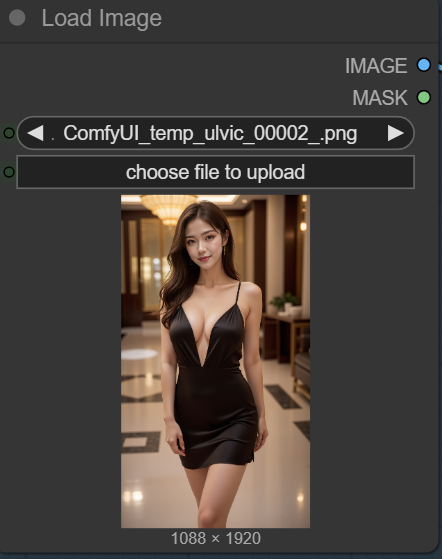
The following examples use this input image:
Prompt:
Change the dress color to pink.
Output:

Prompt:
The girl is holding a sign “kombitz.com”
Output:

Prompt:
set the background to white
Output:

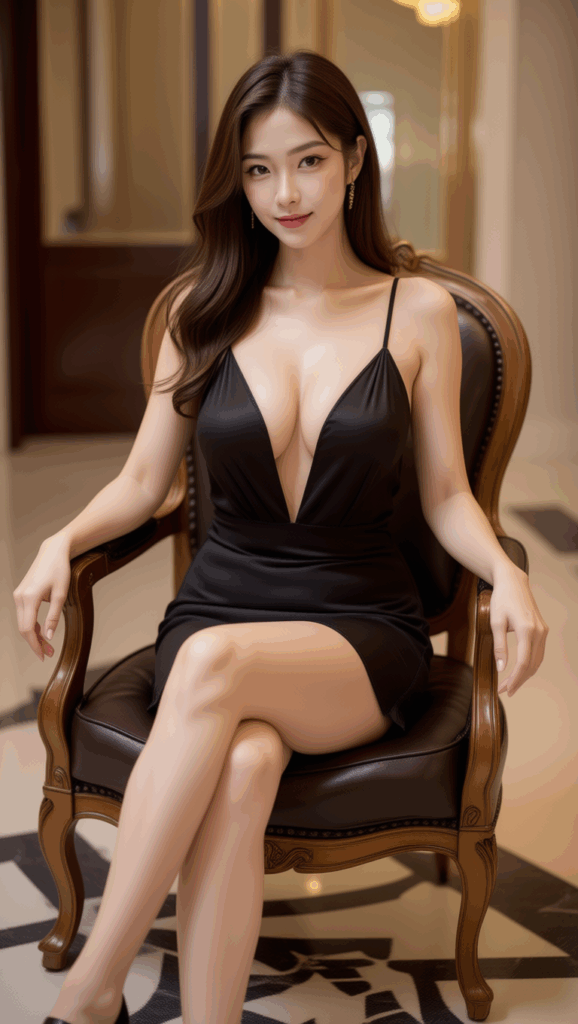
Prompt:
The girl is sitting on a fancy chair with her legs crossed.
Output:
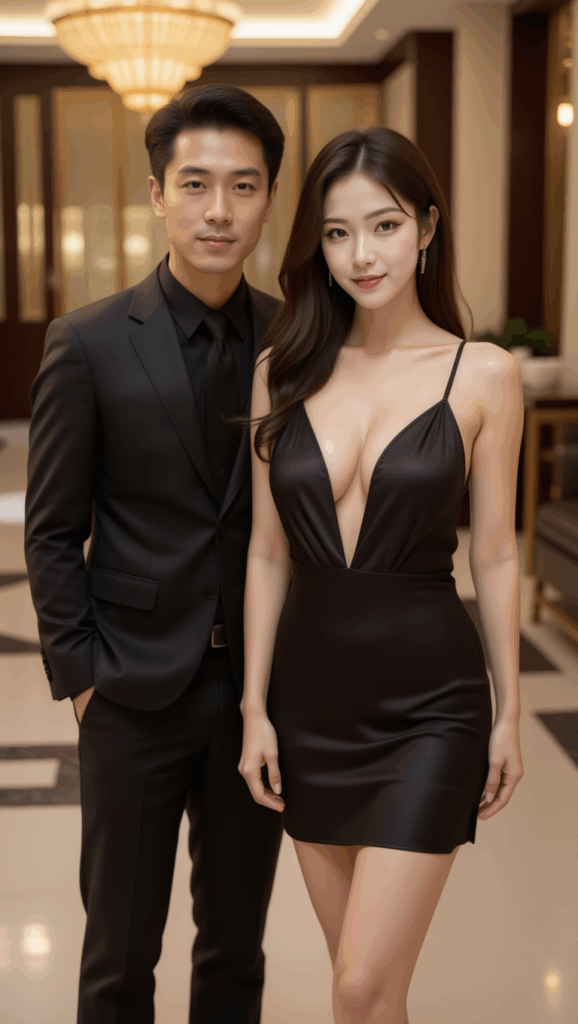
Prompt:
Add a hansome Asian man in black suit to her side.
Output:
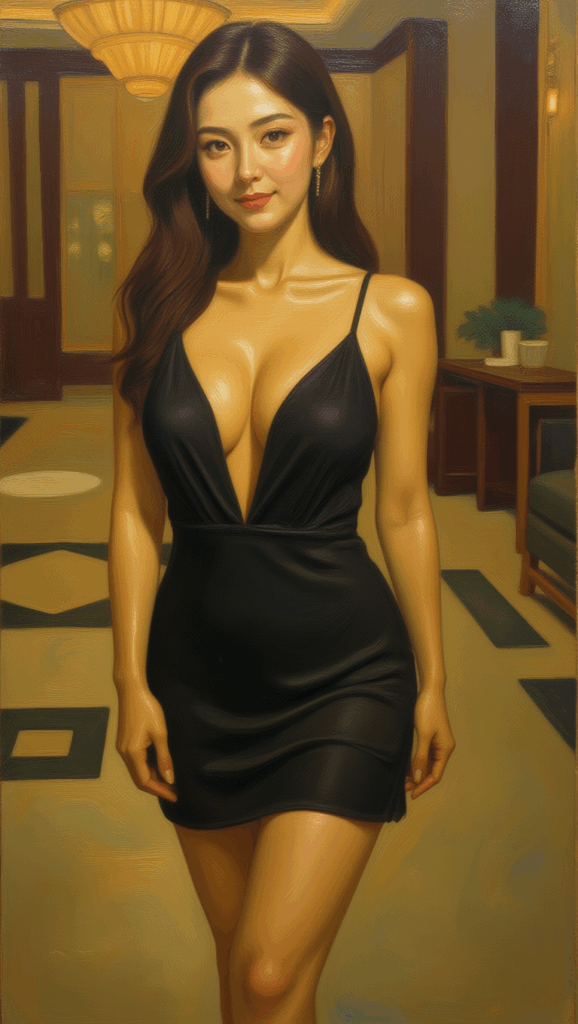
Prompt:
Transform to an oil painting
Output:
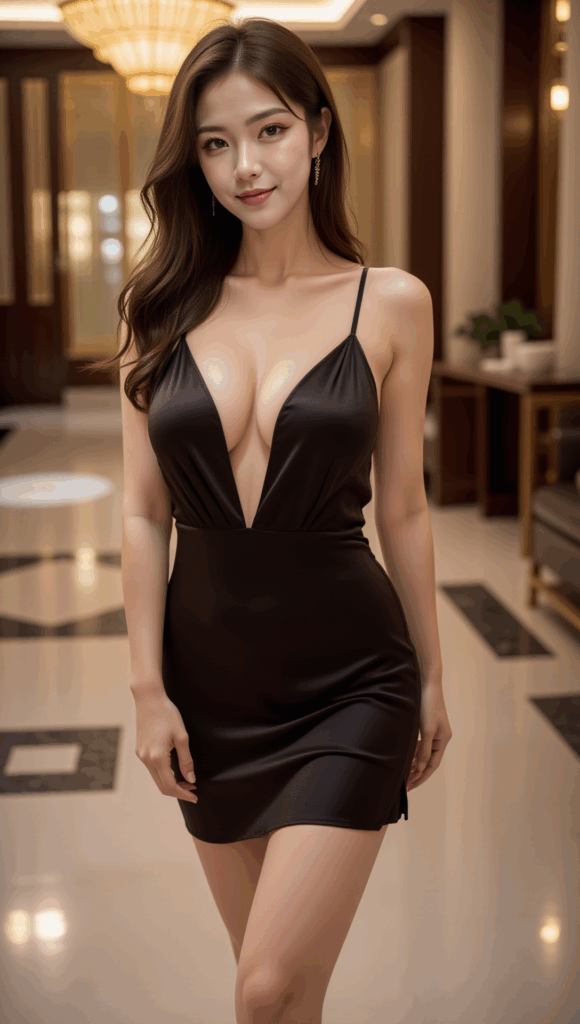
Prompt:
Transform to a Ghibli image
Output:

Conclusion
When you combine Qwen-Image-Edit, ComfyUI, and GGUF, you get a lightweight yet powerful editing pipeline that works fully offline. GGUF ensures smooth performance, while ComfyUI’s node-based workflow lets you chain edits, upscale, and refine results in one place.
Whether you’re building ads, enhancing lifestyle photos, or testing creative campaigns, this setup gives you flexibility and repeatability. With the right prompts, a single image can be transformed into many variations—making it a practical tool for both professionals and hobbyists.
References
- https://docs.comfy.org/tutorials/image/qwen/qwen-image-edit
- https://huggingface.co/QuantStack/Qwen-Image-Edit-GGUF
Further Readings
How to Use Flux.1 Kontext-dev in ComfyUI (GGUF + GPU): Natural Prompts for Any Style
Testing OmniGen2 in ComfyUI vs. Flux.1 Kontext: A Promising Tool That’s Not Quite There Yet
Leave a Reply