
Image-to-image generation with Z-Image-Turbo GGUF in ComfyUI builds directly on the same workflow used for text-to-image. The model, sampler, and prompt setup remain largely unchanged. The main difference is how a reference image is introduced into the pipeline and how strongly the model is allowed to deviate from it.
If you’re thinking about purchasing a new GPU, we’d greatly appreciate it if you used our Amazon Associate links. The price you pay will be exactly the same, but Amazon provides us with a small commission for each purchase. It’s a simple way to support our site and helps us keep creating useful content for you. Recommended GPUs: RTX 5090, RTX 5080, and RTX 5070. #ad
In this article, I’ll walk through a practical image-to-image workflow for Z-Image-Turbo in ComfyUI, focusing on what actually changes compared to text-to-image. Instead of repeating every shared step in detail, this guide summarizes the common setup and concentrates on the image-specific nodes and parameters that affect quality, realism, and consistency.
If you are already familiar with generating images using Z-Image-Turbo in ComfyUI, this guide will help you adapt that workflow for tasks such as refining existing images, enhancing realism, or making controlled edits while preserving the original composition.
Z-Image-Turbo Models
If you have used Z-Image-Turbo before, you can skip this section.
- GGUF Models: You can find the GGUF models here. You only need one model. I have a RTX 5090, and I use the Q8 variant. I downloaded z_image_turbo-Q8_0.gguf. If your GPU has less VRAM, consider the Q5 or Q4 variants. Put the GGUF model in ComfyUI\models\unet\ .
- Text Encoder: Download qwen_3_4b.safetensors and put it in ComfyUI\models\text_encoders\ .
- VAE: Download ae.safetensors and put it in ComfyUI\models\vae\ .
Z-Image-Turbo Installation
- Update your ComfyUI to the latest version if you haven’t already. (Run update\update_comfyui.bat for Windows). Depending on which gguf custom node you installed before, you also need to update the ComfyUI-GGUF or gguf custom node to the latest version if you have not updated it recently.
- Download the json file and open it using ComfyUI.
- Use ComfyUI Manager to install missing nodes.
- Restart ComfyUI.
Nodes
Most nodes are the same as the Z-Image-Turbo text to image workflow. Please see my previous post about the nodes.

This is the only node that’s different. You select an input image here.
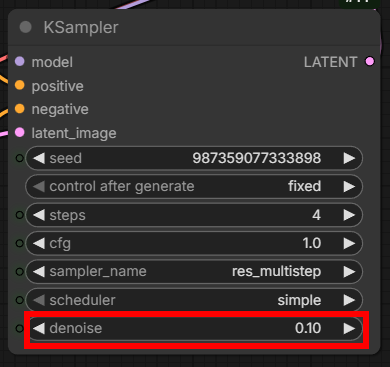
The KSampler is the same, but pay attention to denoise. In text to image workflows, denoise is almost always 1. But in image to image workflows, you might want to keep this number small. In image-to-image workflows, the denoise value controls how strongly the model is allowed to change the input image. Lower denoise values keep the original composition, identity, and structure intact while refining details like lighting, texture, and realism. Higher denoise values give the model more freedom to reinterpret the image, which can improve overall quality but may also introduce composition or identity drift. For Z-Image-Turbo, image-to-image works best as a refinement step, so starting with a low to mid denoise range (0.1 to 0.4) is usually recommended.
Examples
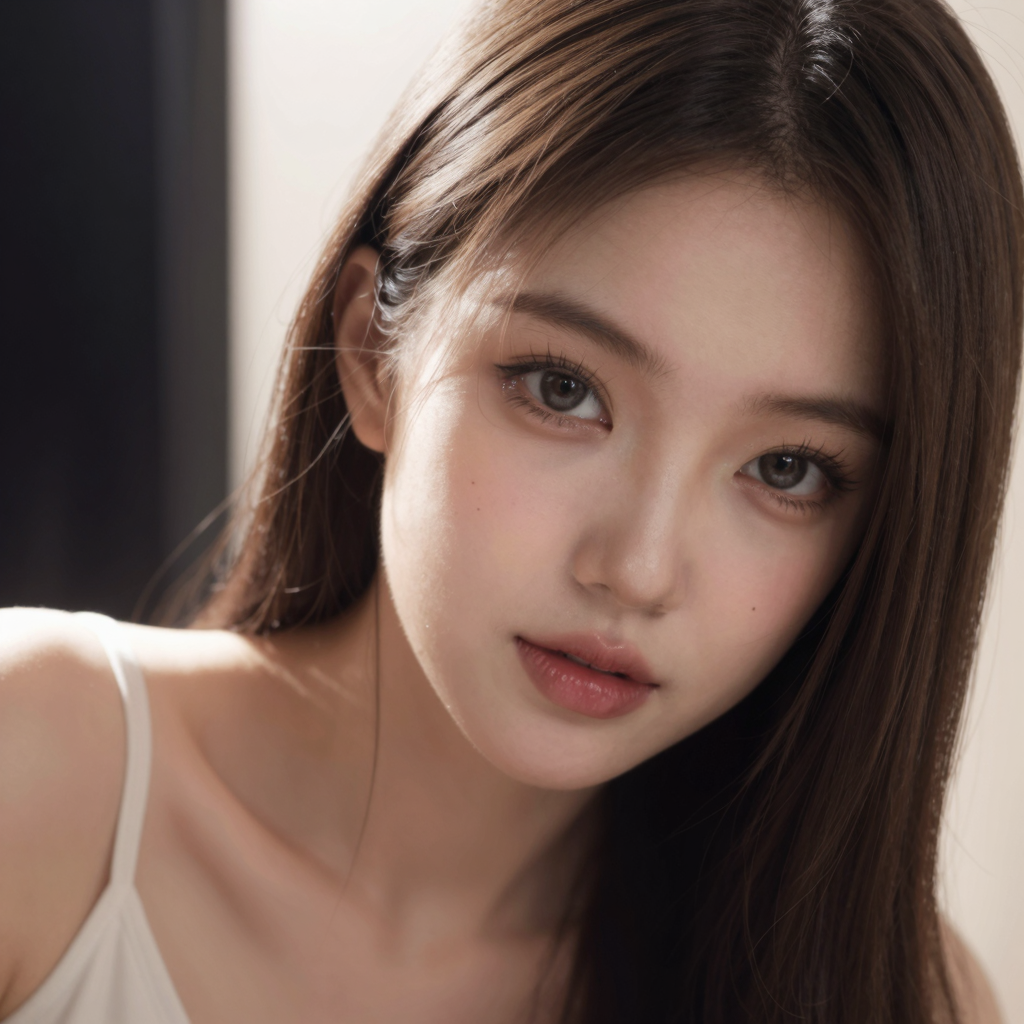
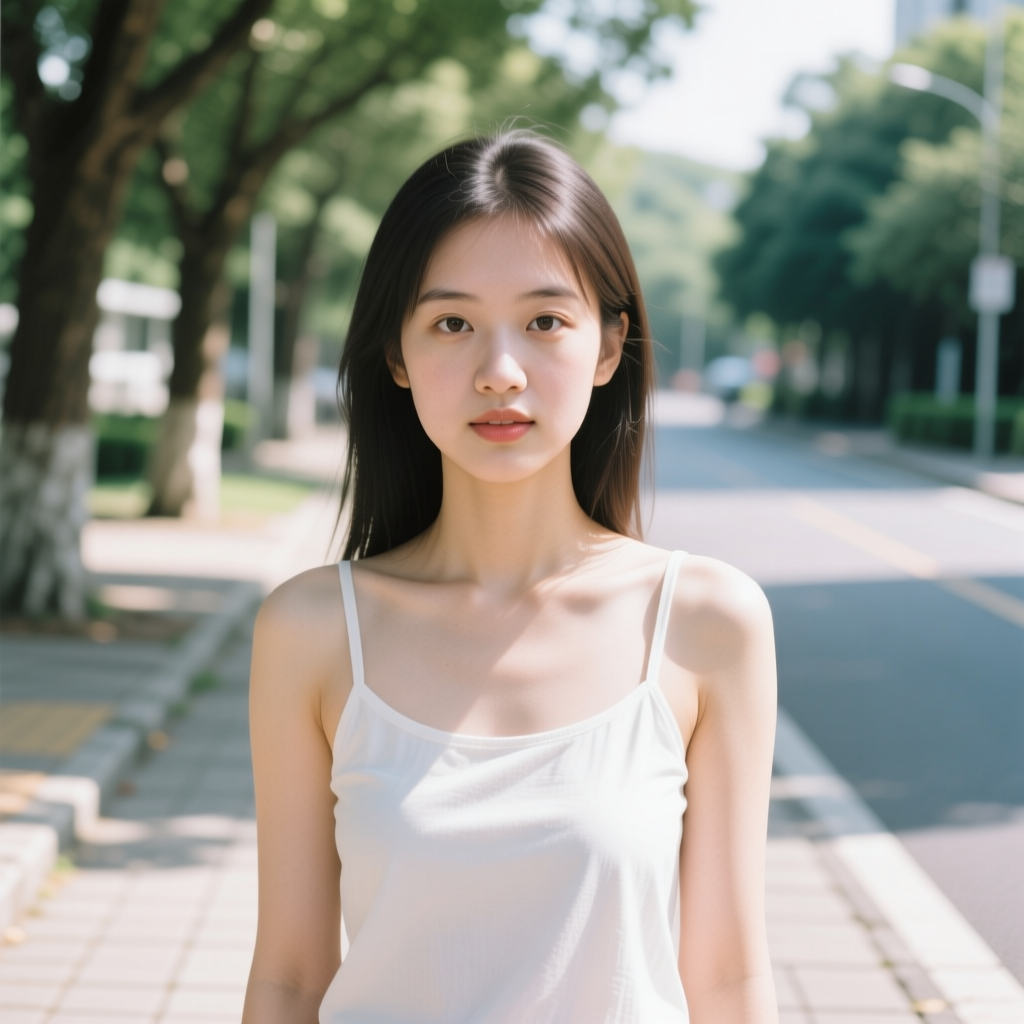
For this example, I am going to demonstrate the effect of denoise.
Input image:

Prompt:
Ultra-realistic portrait. ultra-realistic skin texture.
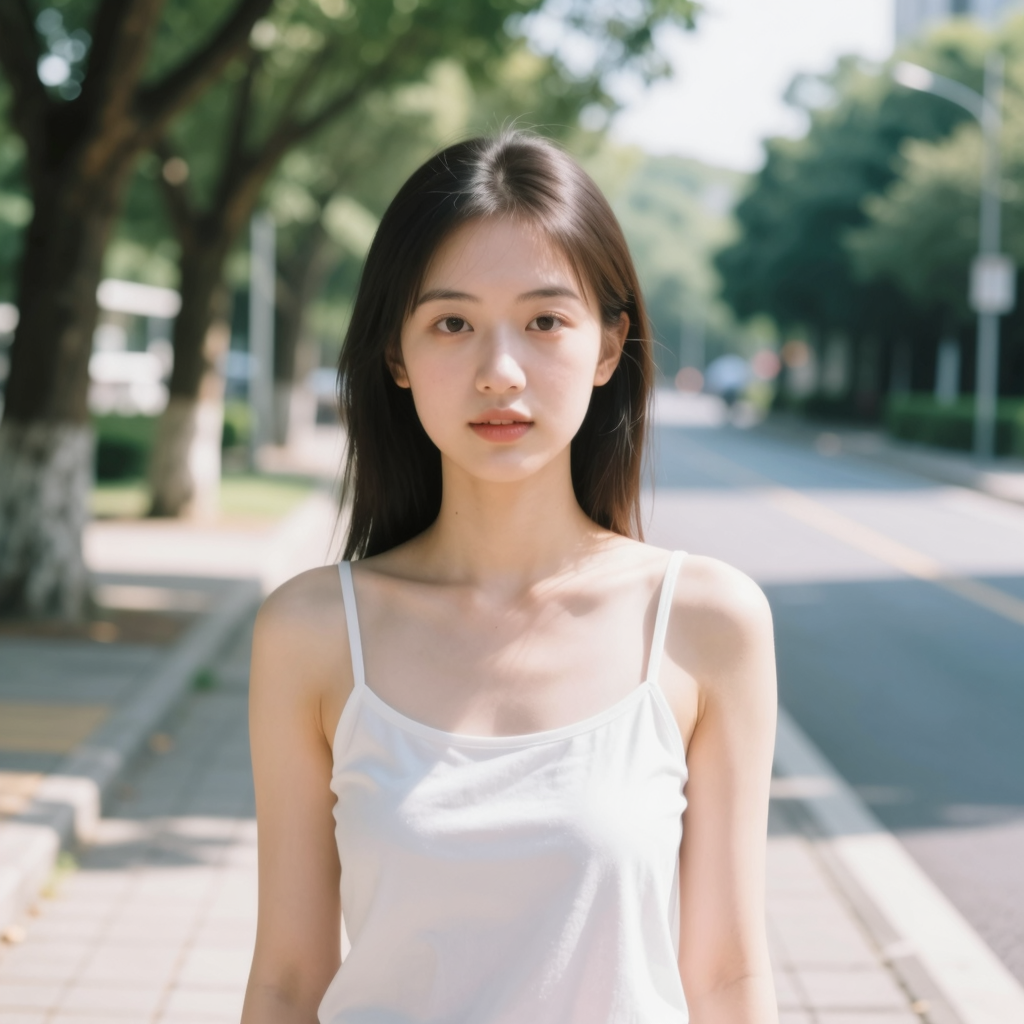
Denoise: 0.1
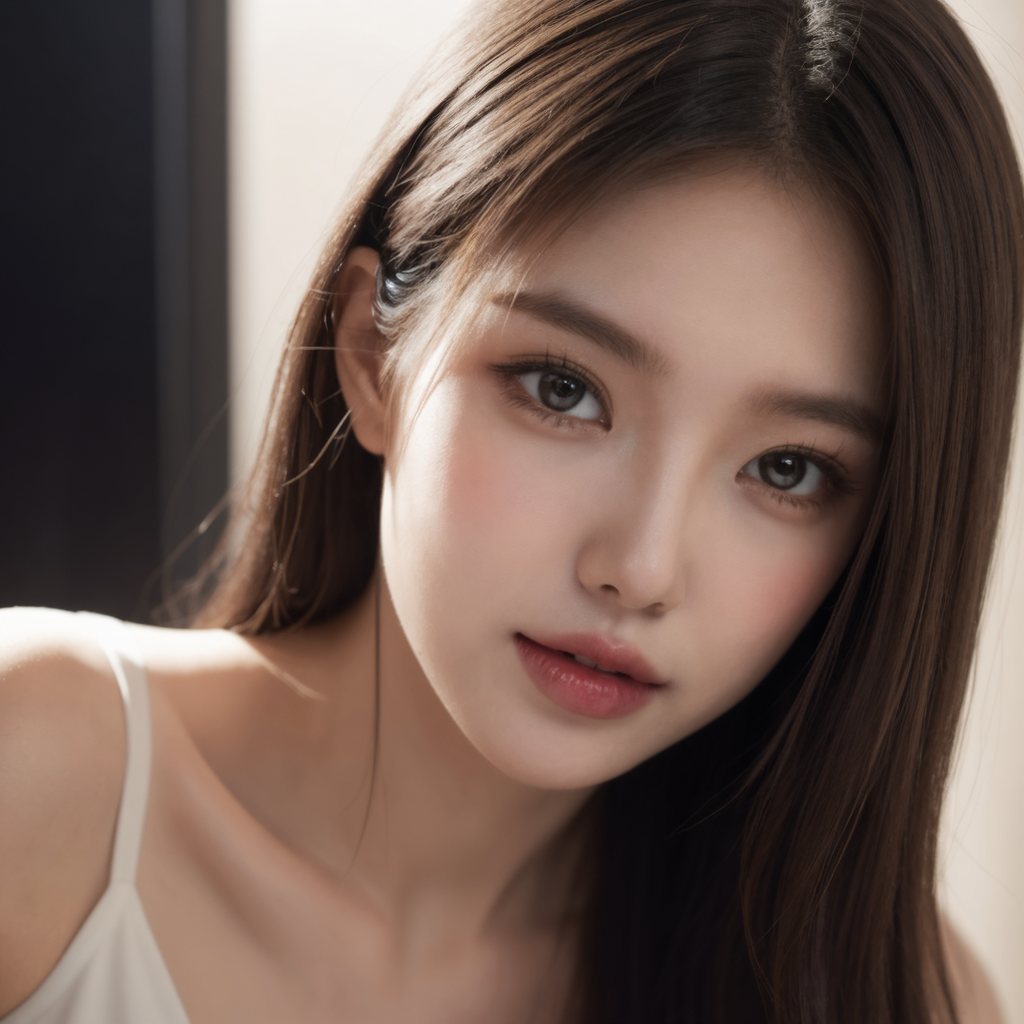
Denoise: 0.2

Denoise: 0.3
Denoise: 0.4
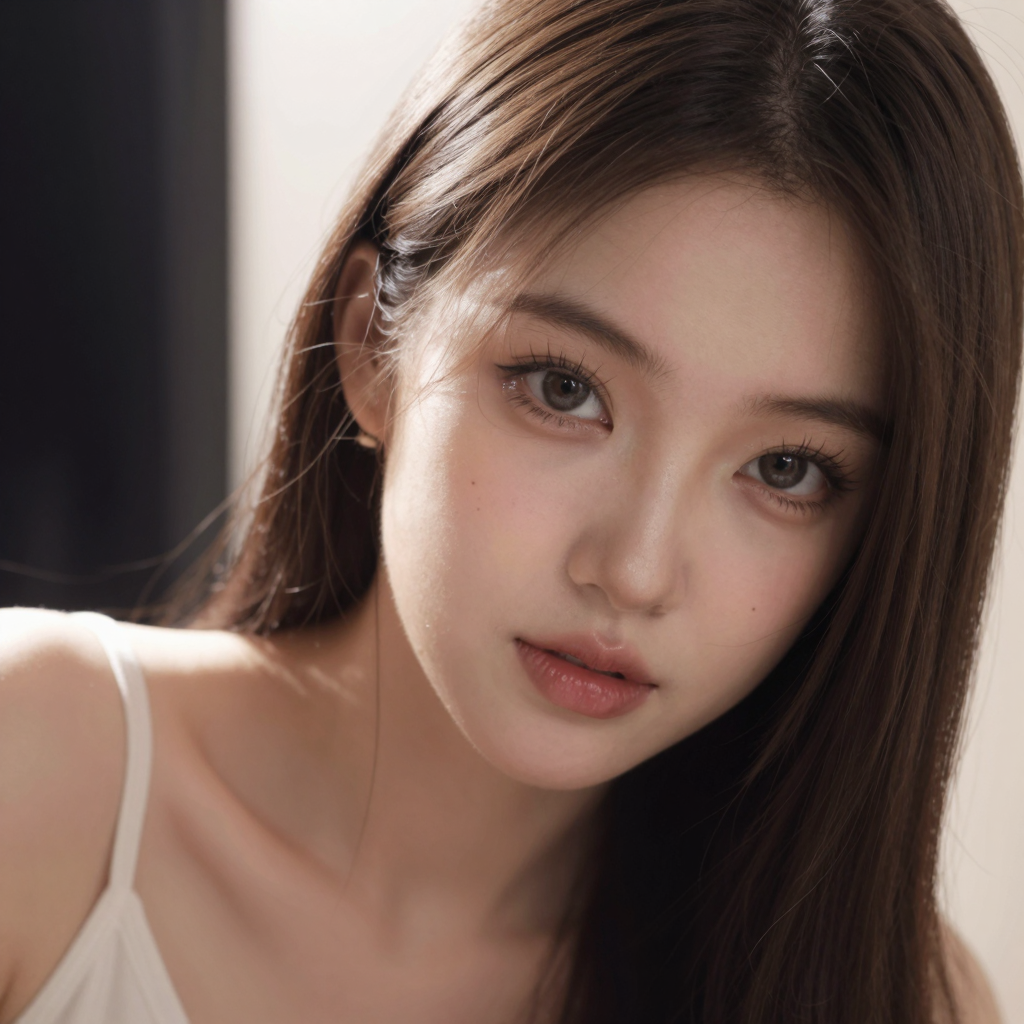
The best effect is achieved for denoise 0.2~0.3. For denoise 0.1, it is not much different from the original one. For denoise 0.4, the likeness of the person begins to change quite a bit.
Input image:
Prompt:
enhance photorealism, improve skin texture and micro detail, natural lighting refinement, realistic color response, accurate shadows, subtle contrast increase, reduce AI artifacts, preserve original composition and pose, realistic depth and lens behavior
Denoise: 0.25
Output image:
Input image:

Prompt:
correct lighting balance, normalize exposure, realistic daylight color temperature, improved dynamic range, natural shadow falloff, clean highlights, subtle cinematic color grading, preserve structure and spatial relationships from input image
Denoise: 0.2
Output image:

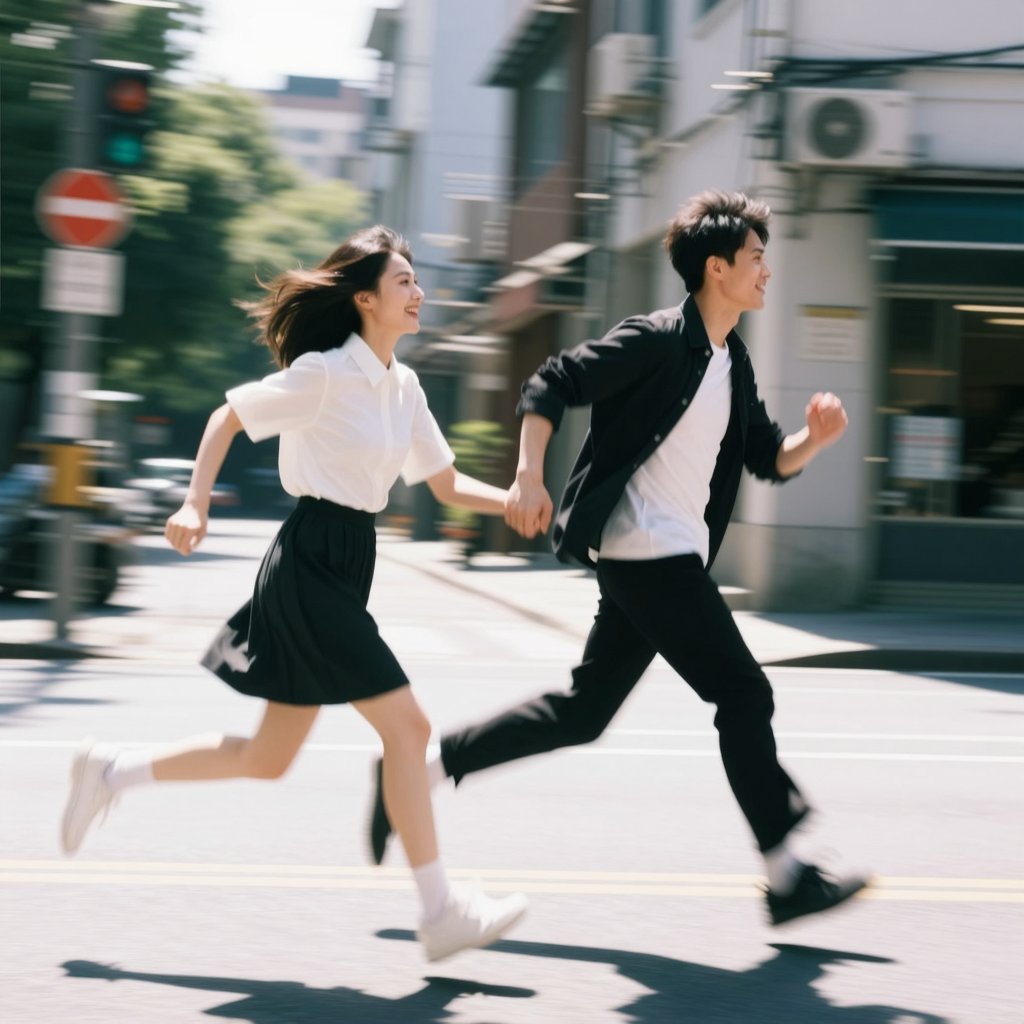
Input image:
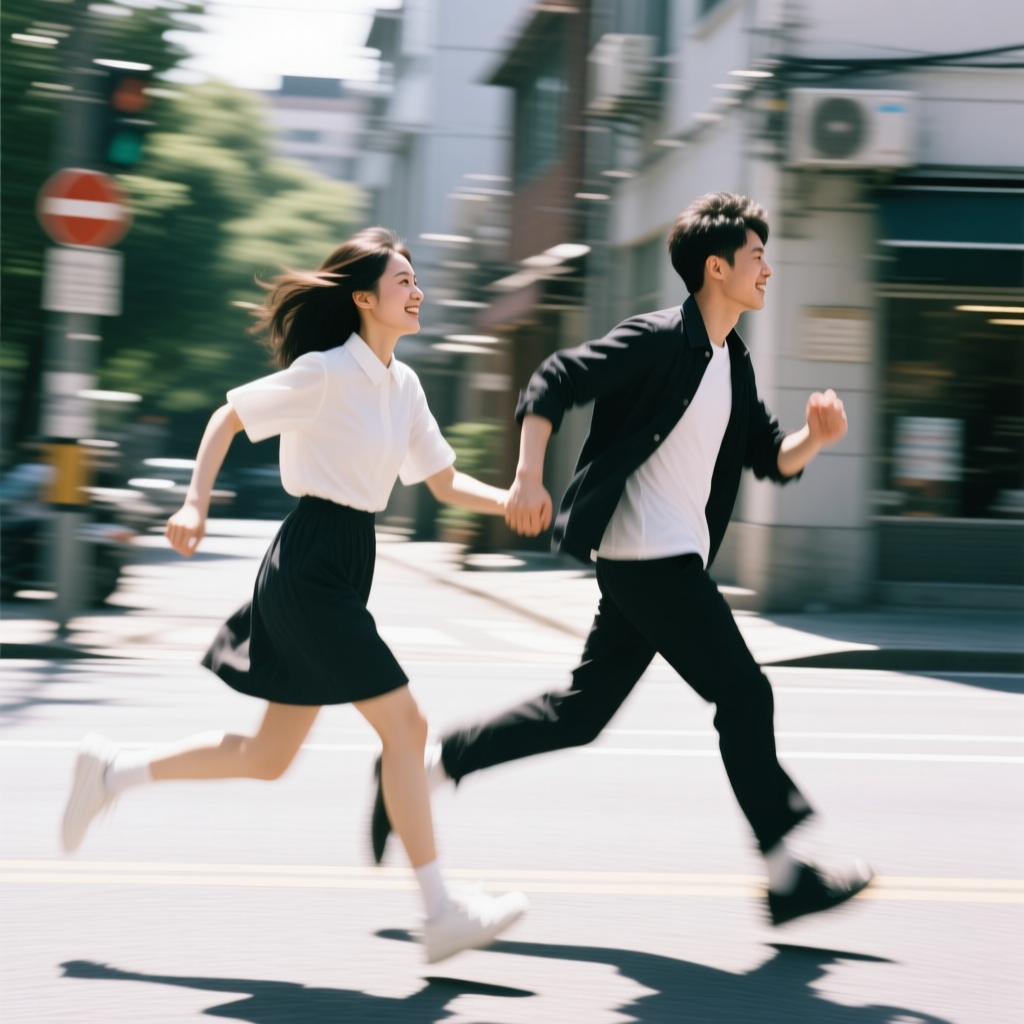
Prompt:
increase fine detail clarity, stabilize textures, reduce noise and distortion, realistic edge definition, consistent lighting across surfaces, preserve spatial layout and motion pose, improve realism for animation or video workflows
Denoise: 0.3
Output image:
Conclusion
Image-to-image generation with z-image-turbo in ComfyUI does not require a completely new workflow. Most of the pipeline is identical to text-to-image, with the key difference being the addition of a reference image and the use of denoise strength to control how much the model alters it.
By keeping the shared setup simple and focusing on image-to-image–specific settings, you can achieve reliable results without overcomplicating the graph. In practice, careful control of denoise strength is far more important than adding extra nodes or aggressive prompt changes.
If you are comfortable with the text-to-image workflow, image-to-image is a natural next step for Z-Image-Turbo. It allows you to refine existing visuals, improve realism, or make targeted adjustments while maintaining the overall structure of the original image.
Further Reading
Generate Realistic Images with Z-Image-Turbo GGUF in ComfyUI
Leave a Reply