
I work with video quite a lot, but most of my workflows are image-to-video, not text-to-video. I usually prefer having a strong visual starting point and then animating from there, which is why T2V models don’t always hold my attention.
If you’re thinking about purchasing a new GPU, we’d greatly appreciate it if you used our Amazon Associate links. The price you pay will be exactly the same, but Amazon provides us with a small commission for each purchase. It’s a simple way to support our site and helps us keep creating useful content for you. Recommended GPUs: RTX 5090, RTX 5080, and RTX 5070. #ad
That changed with LTX-2. Its strength in animation quality, motion consistency, and stylized movement makes it stand out, even when driven purely by text prompts. Combined with GGUF support in ComfyUI, LTX-2 becomes practical to run without extreme hardware requirements, which makes it much easier to experiment with. If you are looking for image-to-video workflow, please check out this post.
LTX-2 Models
The models are the same as the image-to-video models. You can skip this section if you have downloaded them already.
- GGUF Model: The GGUF models can be found here. I have a RTX 5090, and I used the Q8 variant. I downloaded ltx-2-19b-dev_Q8_0.gguf. If you have less VRAM, use other variants like Q6 or Q4. Put the GGUF models in ComfyUI\models\unet\ .
- Text Encoder: Download gemma_3_12B_it.safetensors and ltx-2-19b-embeddings_connector_dev_bf16.safetensors ; put them in ComfyUI\models\text_encoders\ .
- VAE: Download LTX2_video_vae_bf16.safetensors and LTX2_audio_vae_bf16.safetensors , put them in ComfyUI\models\vae\ .
- Latent Upscale Mode: Download ltx-2-spatial-upscaler-x2-1.0.safetensors , and put it under ComfyUI\models\latent_upscale_models\ .
- LoRA: Download ltx-2-19b-distilled-lora-384.safetensors and ltx-2-19b-ic-lora-detailer.safetensors . Place them in ComfyUI\models\loras\ .
LTX-2 Text-to-Video GGUF Installation
- Update your ComfyUI to the latest version if you haven’t already. (Run update\update_comfyui.bat for Windows). You also need to update ComfyUI-GGUF and ComfyUI-KJNodes to the latest versions.
- Download the json file, and open it using ComfyUI.
- Use ComfyUI Manager to install missing nodes.
- Restart ComfyUI.
Nodes
Step 1 nodes:
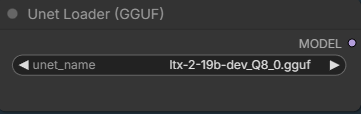
Select the GGUF model you downloaded.
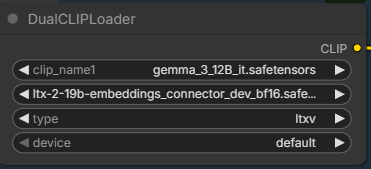
Pick the two text encoders.
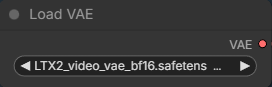
Load the video VAE.
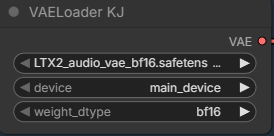
You need this new node to load audio VAE. In the future, you might be able to use the regular Load VAE node to load the audio VAE.
Step 2 nodes:
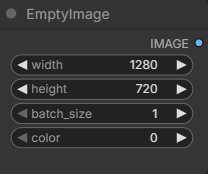
Specify the width and height.
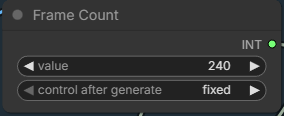
Enter the number of frames you want to generate. The default frame per second is 24. 240 frames is about 10 seconds.
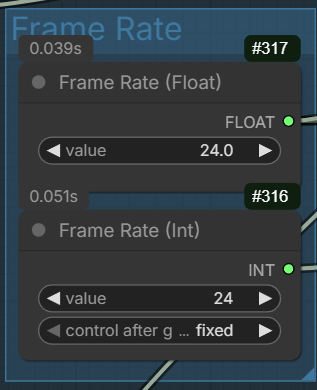
Enter the frame rate here if you want to experiment different frame rate. Note that there are two fields to change. One float and one int. Someone on reddit suggested that using 48 fps renders better results. Of course, you’ll need more VRAM if you want to try 48 fps for the same duration.
Step 3 node:
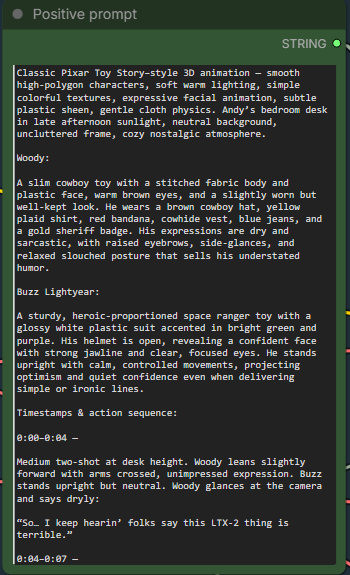
Enter positive prompt here. This workflow uses the distilled LoRA and the cfg is set to 1. Therefore, negative prompt won’t have affect on the generation.
LoRA nodes:

The first LoRA is for making the model more efficient to run. The second LoRA is a detailer. Both are optional and they are not related to camera. There are also a lot of different camera LoRAs that you can try.
Sampler stage node:
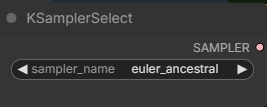
I used this sampler with good results. The official workflows use res_2s sampler. You can try it if you have RES4LYF installed.
Examples
Prompt:
Classic Pixar Toy Story–style 3D animation — smooth high-polygon characters, soft warm lighting, simple colorful textures, expressive facial animation, subtle plastic sheen, gentle cloth physics. Andy’s bedroom desk in late afternoon sunlight, neutral background, uncluttered frame, cozy nostalgic atmosphere.
Woody:
A slim cowboy toy with a stitched fabric body and plastic face, warm brown eyes, and a slightly worn but well-kept look. He wears a brown cowboy hat, yellow plaid shirt, red bandana, cowhide vest, blue jeans, and a gold sheriff badge. His expressions are dry and sarcastic, with raised eyebrows, side-glances, and relaxed slouched posture that sells his understated humor.
Buzz Lightyear:
A sturdy, heroic-proportioned space ranger toy with a glossy white plastic suit accented in bright green and purple. His helmet is open, revealing a confident face with strong jawline and clear, focused eyes. He stands upright with calm, controlled movements, projecting optimism and quiet confidence even when delivering simple or ironic lines.
Timestamps & action sequence:
0:00–0:04 —
Medium two-shot at desk height. Woody leans slightly forward with arms crossed, unimpressed expression. Buzz stands upright but neutral. Woody glances at the camera and says dryly:
“So… I keep hearin’ folks say this LTX-2 thing is terrible.”
0:04–0:07 —
Buzz turns his head toward Woody, then back to camera, visor catching the light. He gestures calmly with one hand:
“And yet… here we are. Fully animated.”
0:07–0:10 —
Camera slowly dollies in. Woody shrugs, palms up:
“Made this whole thing in five minutes.”
Buzz gives a confident half-smile and a small nod. Hold on their faces for the final beat.
Audio:
Woody’s relaxed, sarcastic drawl (Tom Hanks vibe). Buzz’s steady, confident heroic voice (Tim Allen vibe). Soft room tone, faint distant kid noise from hallway. No music — clean and conversational.
Output:
Prompt:
SpongeBob SquarePants stands inside the Krusty Krab, facing the camera. He has his classic square yellow sponge body, large blue eyes, buck teeth, white shirt, red tie, brown square pants, tall white socks, and black shoes. The camera is fixed and does not move. SpongeBob gently bounces up and down while smiling and speaking directly to the viewer, saying: “Hi there! Welcome to the Krusty Krab!” His body shape, facial features, and proportions remain consistent throughout the clip with no distortion. The animation uses bright colors, flat cel-shaded textures, and clean outlines, matching the classic 2D cartoon style of the show. The background remains static and colorful, with no camera movement, no depth blur, and no scene changes. The motion is playful, smooth, and exaggerated but controlled, like a short TV cartoon loop.
Output:
Prompt:
Finn stands in the Candy Kingdom courtyard, facing the camera. He has his iconic white bear hat, blue shirt, blue shorts, and green backpack. The camera is fixed and does not move. He gently sways his upper body side to side while smiling and speaking to the viewer: “Hey! Ready for an adventure?” Facial features, body proportions, and clothing remain consistent throughout the clip. The background is static, colorful, flat-shaded, and in the classic Adventure Time cartoon style. Motion is smooth, playful, and minimal, like a short cartoon talking loop.
Output:
Prompt:
A 2D animated scene in the visual style of My Little Pony: Friendship Is Magic.
A pastel-colored pony character is standing in a bright, simple outdoor setting in Ponyville, flat colors, clean outlines, soft shading, rounded shapes, consistent cartoon proportions.
Static camera, eye-level, medium shot.
The pony gently sways in place and blinks occasionally, with very simple mouth movement while speaking.
No walking, no head turns, no camera movement, no cuts.
Dialog (friendly, upbeat tone):
“Hi! I can finally talk now. Come follow me!”
Smooth limited animation, TV-cartoon timing, stable character shape, minimal motion, consistent frame-to-frame appearance.
Output:
Conclusion
Even as someone who primarily works with image-to-video, LTX-2 made text-to-video genuinely enjoyable to use. Its emphasis on animation and motion coherence helps bridge the gap between pure T2V generation and the kind of control I usually expect from I2V workflows.
Running LTX-2 in GGUF format inside ComfyUI significantly lowers the barrier to entry, making T2V experiments feasible on more modest GPUs while still delivering solid animated results. It’s not trying to compete with high-end cinematic video models, but for animated scenes, stylized visuals, and rapid iteration, it performs extremely well.
If you normally rely on image-to-video and rarely touch text-to-video, LTX-2 is worth trying. Hopefully, this article helps you get started faster and gives you a clear idea of where LTX-2 Text-to-Video really shines in ComfyUI.
References
- https://huggingface.co/Lightricks/LTX-2/tree/main
- https://ltx.io/model/model-blog/prompting-guide-for-ltx-2
Leave a Reply