
Image-to-image workflows are one of the most powerful ways to refine AI-generated visuals, especially when you want better structure, improved lighting, or stronger realism without starting from scratch. In this guide, I’ll walk through my ComfyUI image-to-image workflow using the Z-Image Base GGUF model.
If you’re thinking about purchasing a new GPU, we’d greatly appreciate it if you used our Amazon Associate links. The price you pay will be exactly the same, but Amazon provides us with a small commission for each purchase. It’s a simple way to support our site and helps us keep creating useful content for you. Recommended GPUs: RTX 5090, RTX 5080, and RTX 5070. #ad
Unlike traditional checkpoint setups, GGUF-based models offer a more lightweight and flexible approach, making them ideal for users running mid-range GPUs or experimenting with different quantization levels. With the right denoise strength, resolution strategy, and upscaling pipeline, you can dramatically improve image clarity while preserving the original composition.
This article breaks down the exact node flow, key settings, and practical tuning tips I use to get consistent, high-quality results from Z-Image Base GGUF in ComfyUI.
Z-Image Base Models
If you have used Z-Image Base text to image GGUF model before, you can skip this section.
- GGUF Models: You can find the GGUF models here. You only need one model. I have a RTX 5090, and I use the Q8 variant. I downloaded z_image_turbo-Q8_0.gguf. If your GPU has less VRAM, consider the Q5 or Q4 variants. Put the GGUF model in ComfyUI\models\unet\ .
- Text Encoder: Download qwen_3_4b.safetensors and put it in ComfyUI\models\text_encoders\ .
- VAE: Download ae.safetensors and put it in ComfyUI\models\vae\ .
Z-Image Base Image-to-Image Workflow Installation
- Update your ComfyUI to the latest version if you haven’t already. (Run update\update_comfyui.bat for Windows). Depending on which gguf custom node you installed before, you also need to update the ComfyUI-GGUF or gguf custom node to the latest version if you have not updated it recently.
- Download the json file and open it using ComfyUI.
- Use ComfyUI Manager to install missing nodes.
- Restart ComfyUI.
Nodes
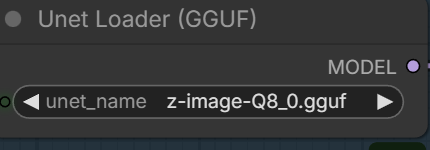
Select the GGUF model you downloaded here.
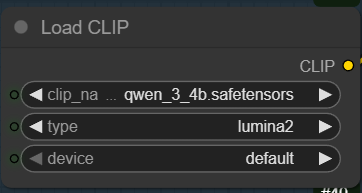
qwen_3_4b is used as the text encoder. Note that the type is lumina2.
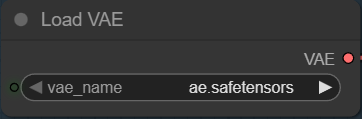
Z-Image uses Flux.1’s VAE.
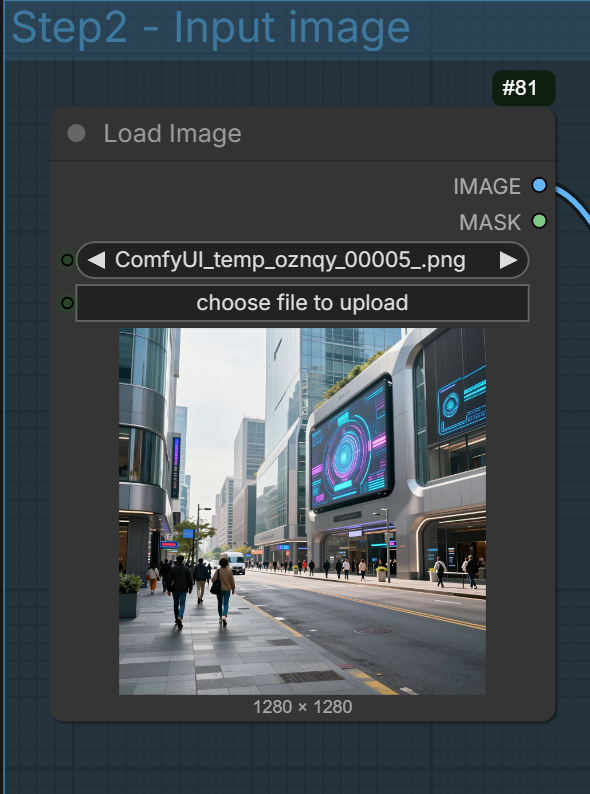
Select the input image.
You can enter negative prompt now, which is not possible with Z-Image-Turbo.
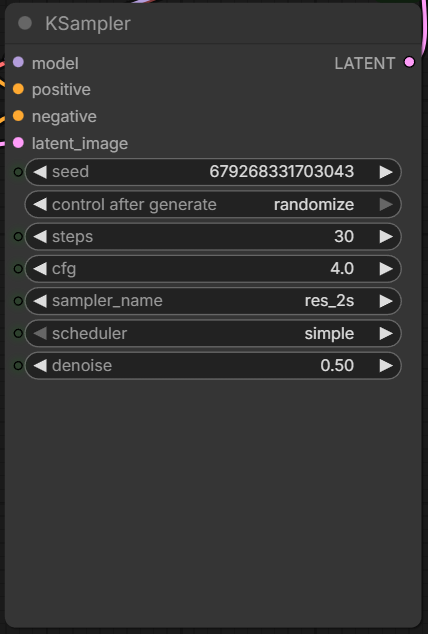
Recommended steps: 28 ~ 50. Recommended cfg: 3 ~ 5. Note that denoise is not 1 anymore.
Denoise (in image-to-image) controls how much of the original image is changed.
Technically, the model adds noise to your input image and then regenerates it according to your new prompt.
The denoise strength determines how much noise is added — which controls how much the image is allowed to change.
Low Denoise (0.1 – 0.3)
-
Keeps original pose, face, and composition
-
Good for lighting tweaks, detail enhancement
-
Very stable
Medium Denoise (0.3 – 0.5)
-
Allows outfit, mood, or background changes
-
Keeps general structure
-
Best balance for most edits
High Denoise (0.5+)
-
Major transformation
-
Pose and identity may shift
-
Closer to regenerating from scratch
Simple rule:
Lower = preserve.
Higher = transform.
For most i2i edits, 0.35–0.4 is the sweet spot.
Z-Image Base Image to Image Examples
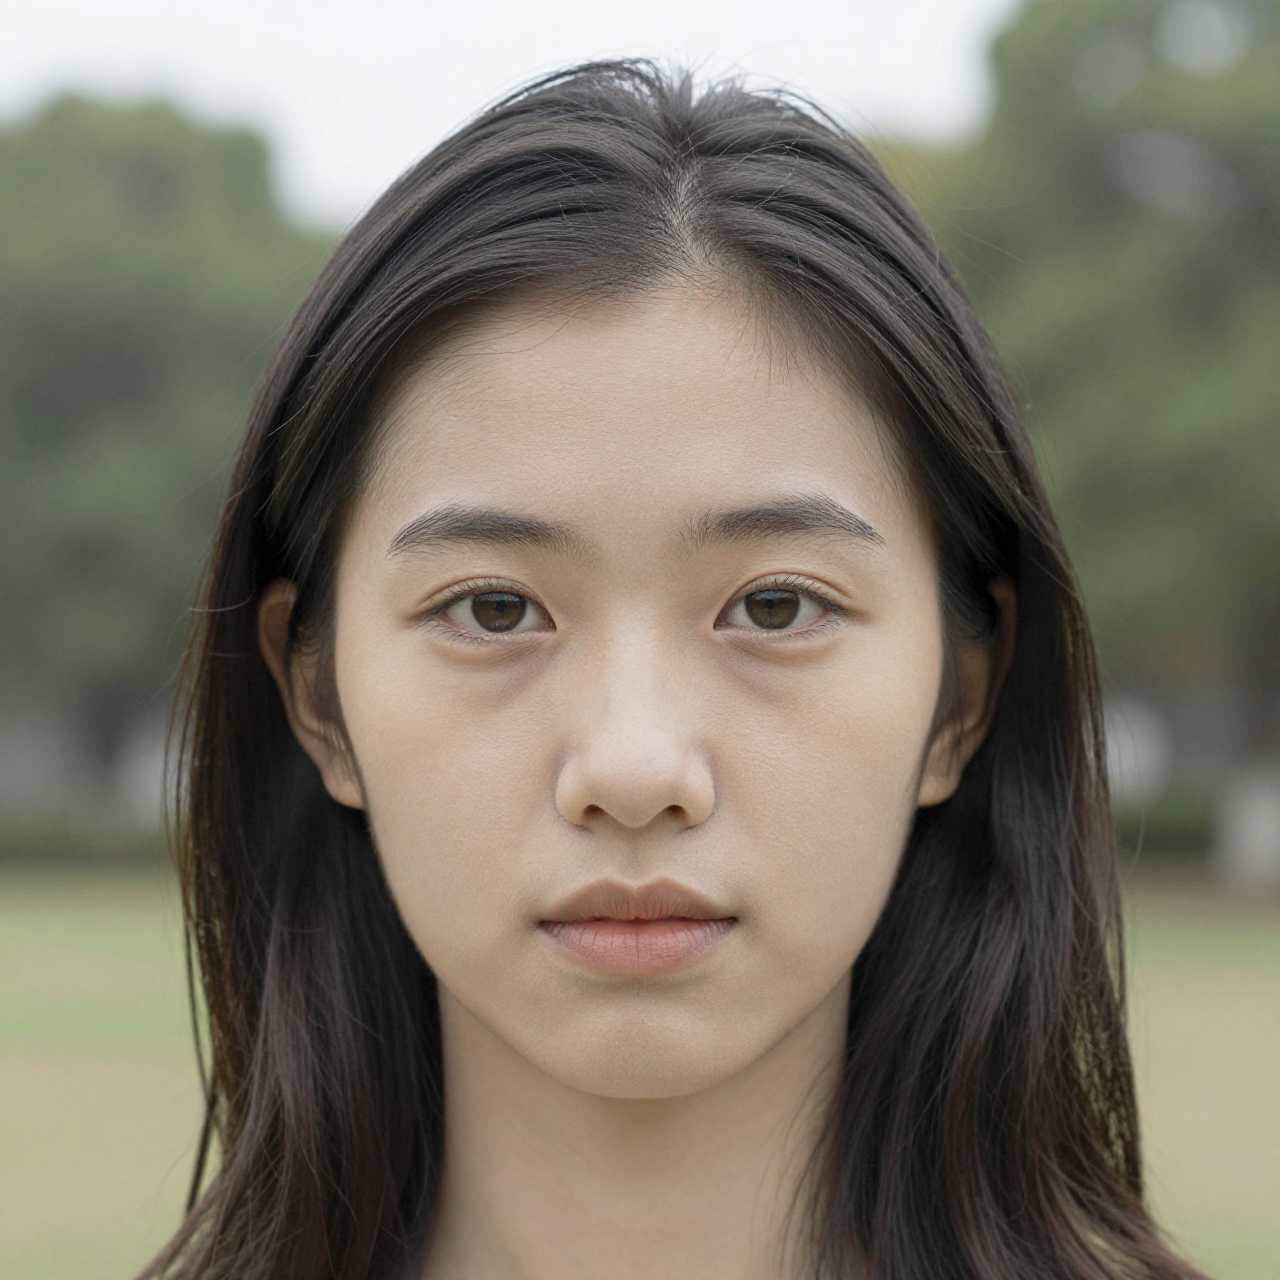
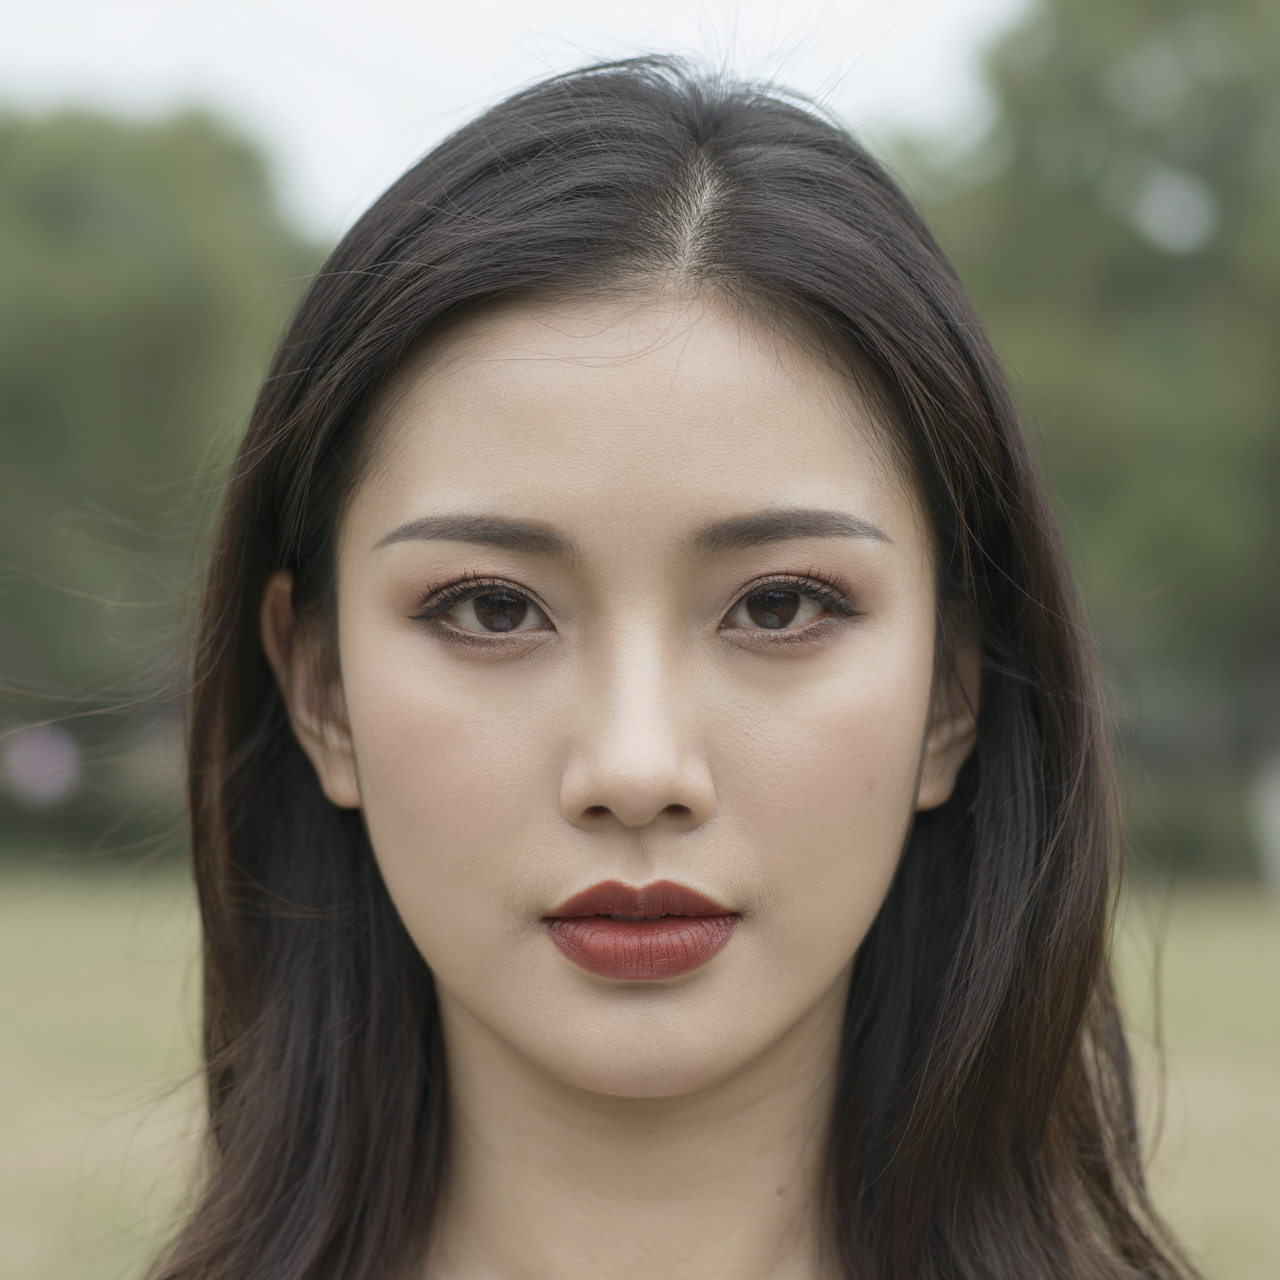
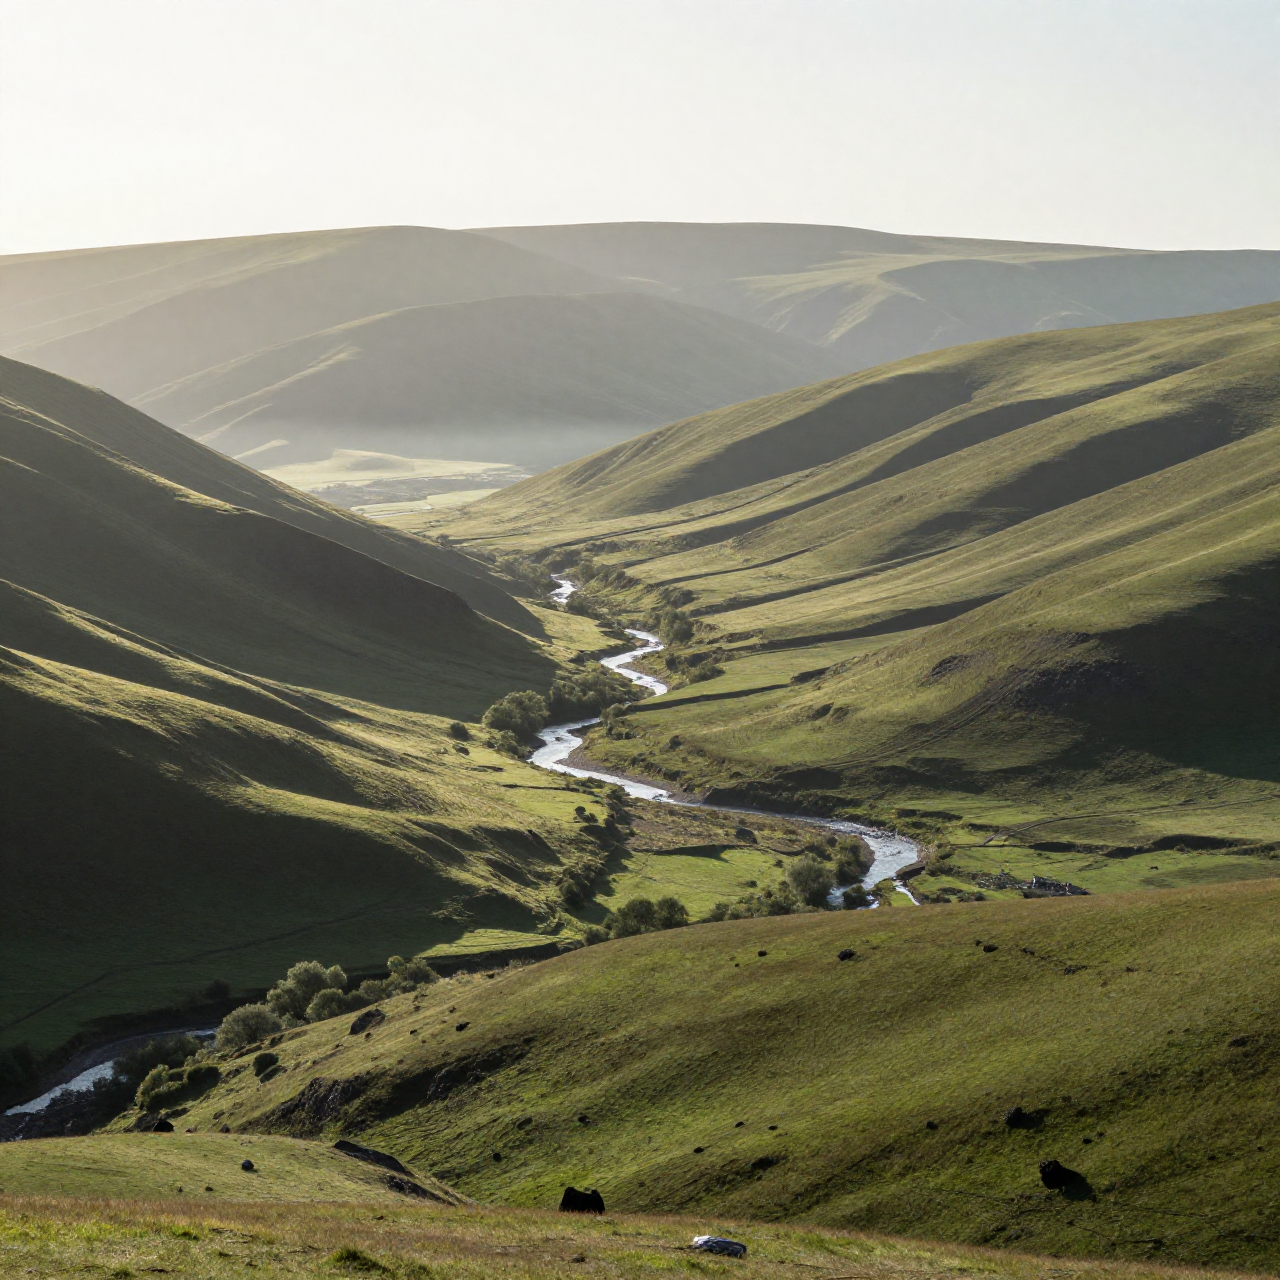
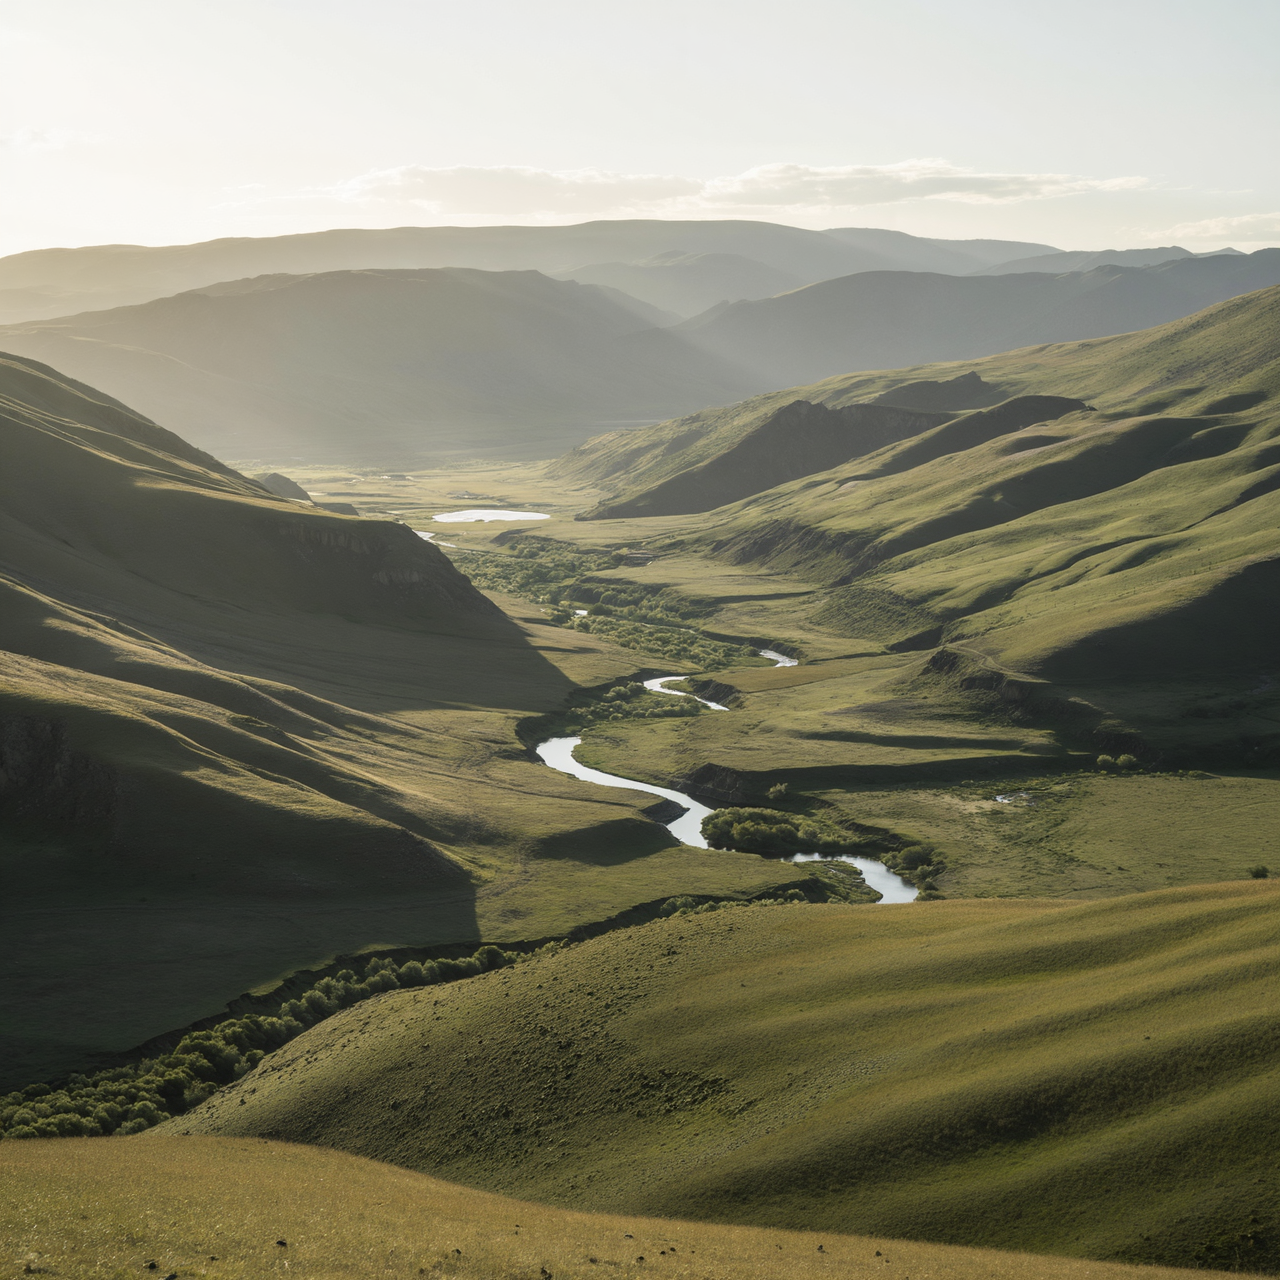
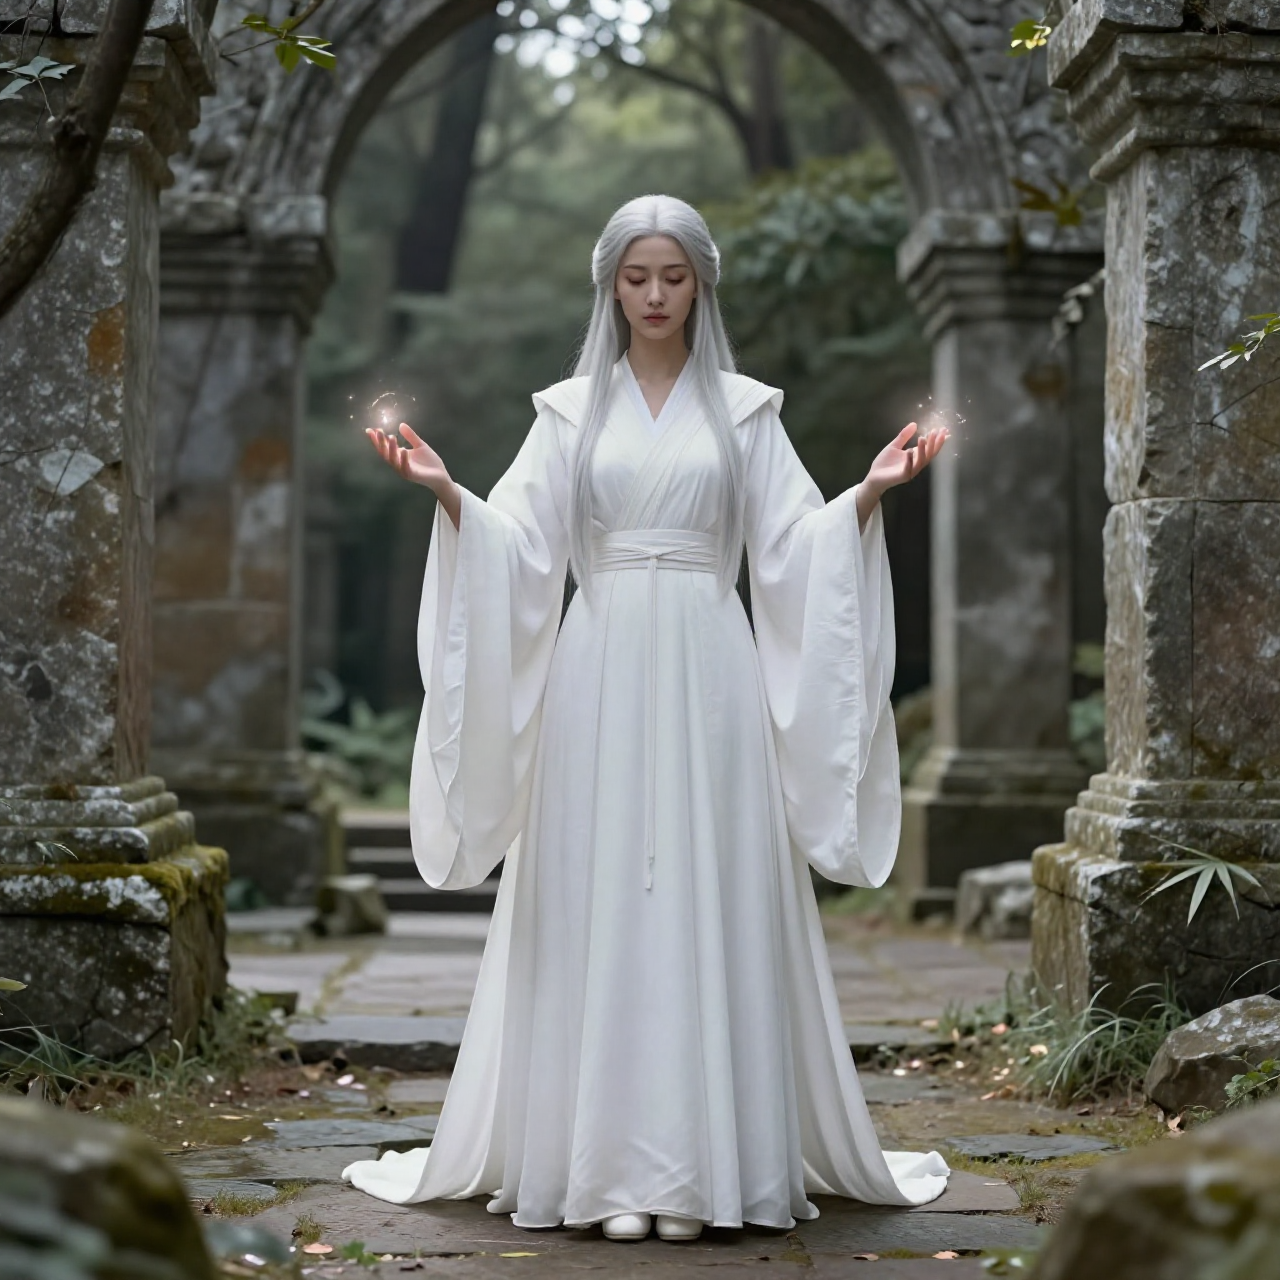
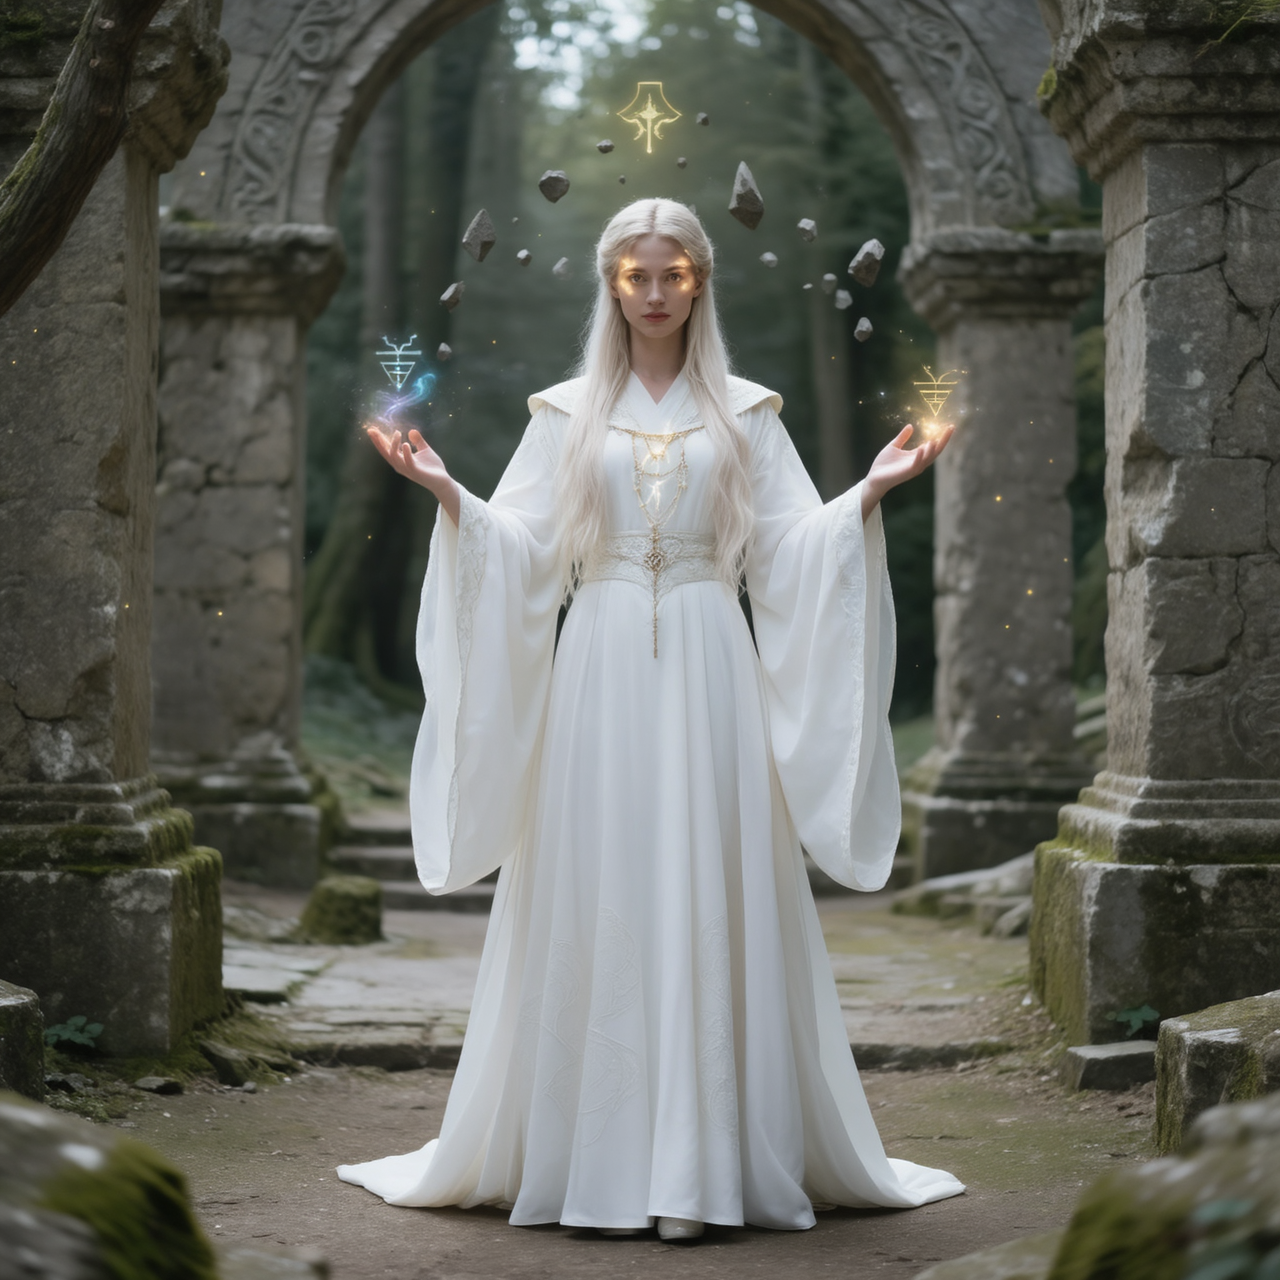
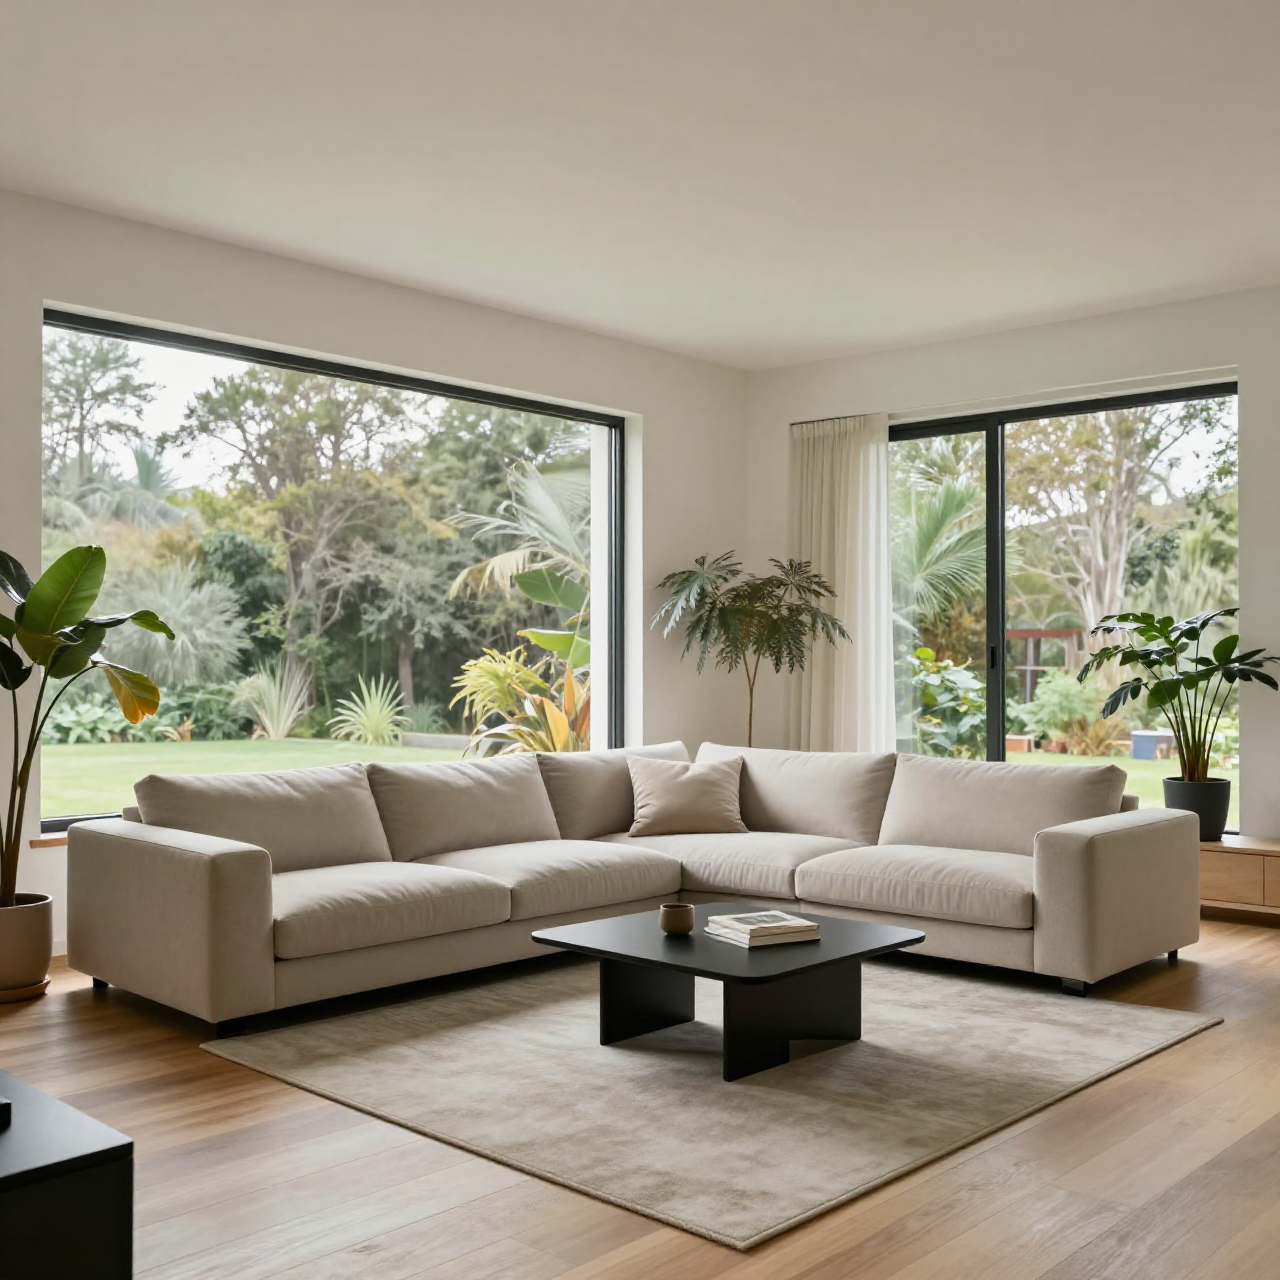
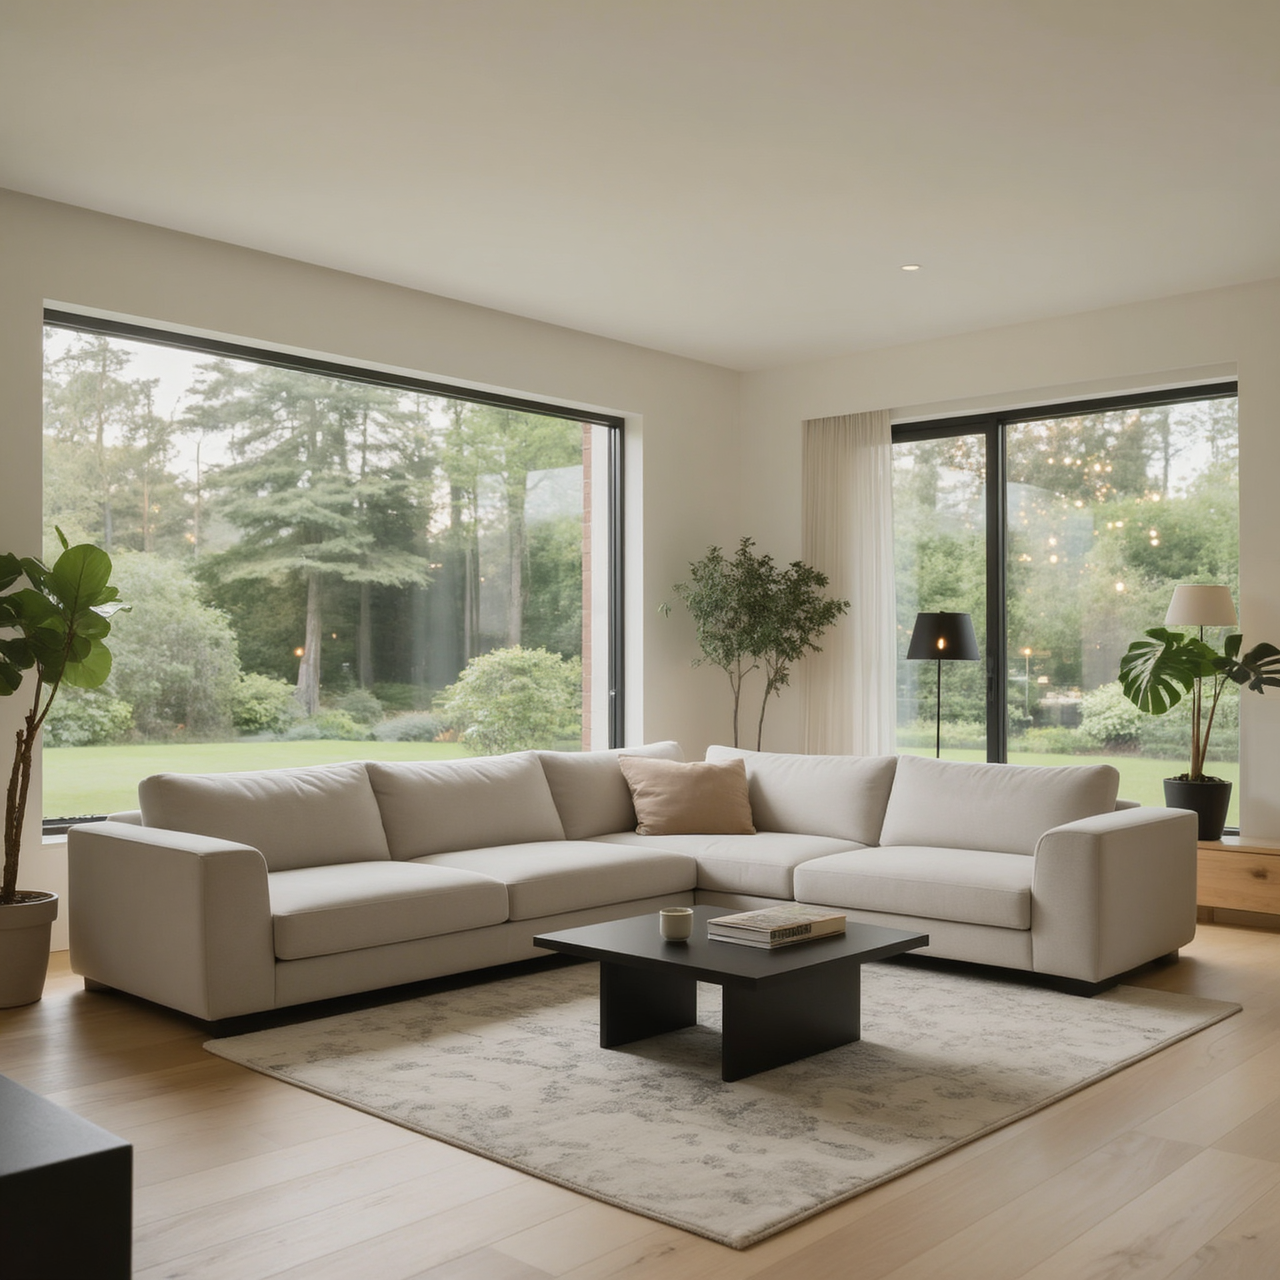
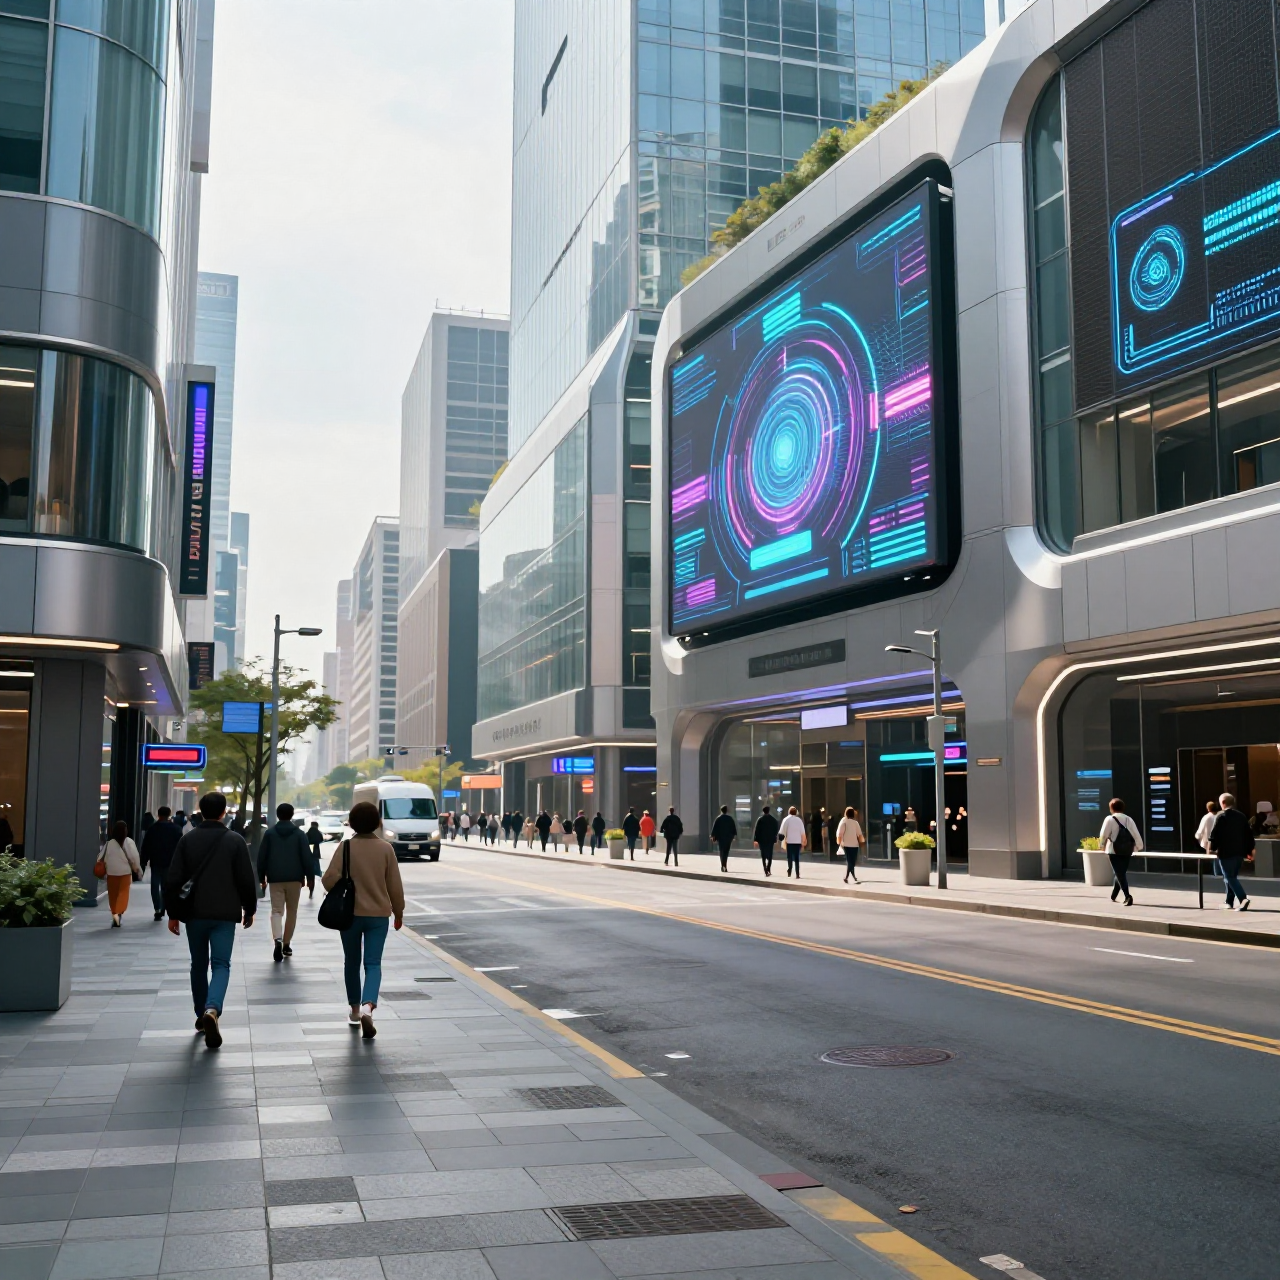
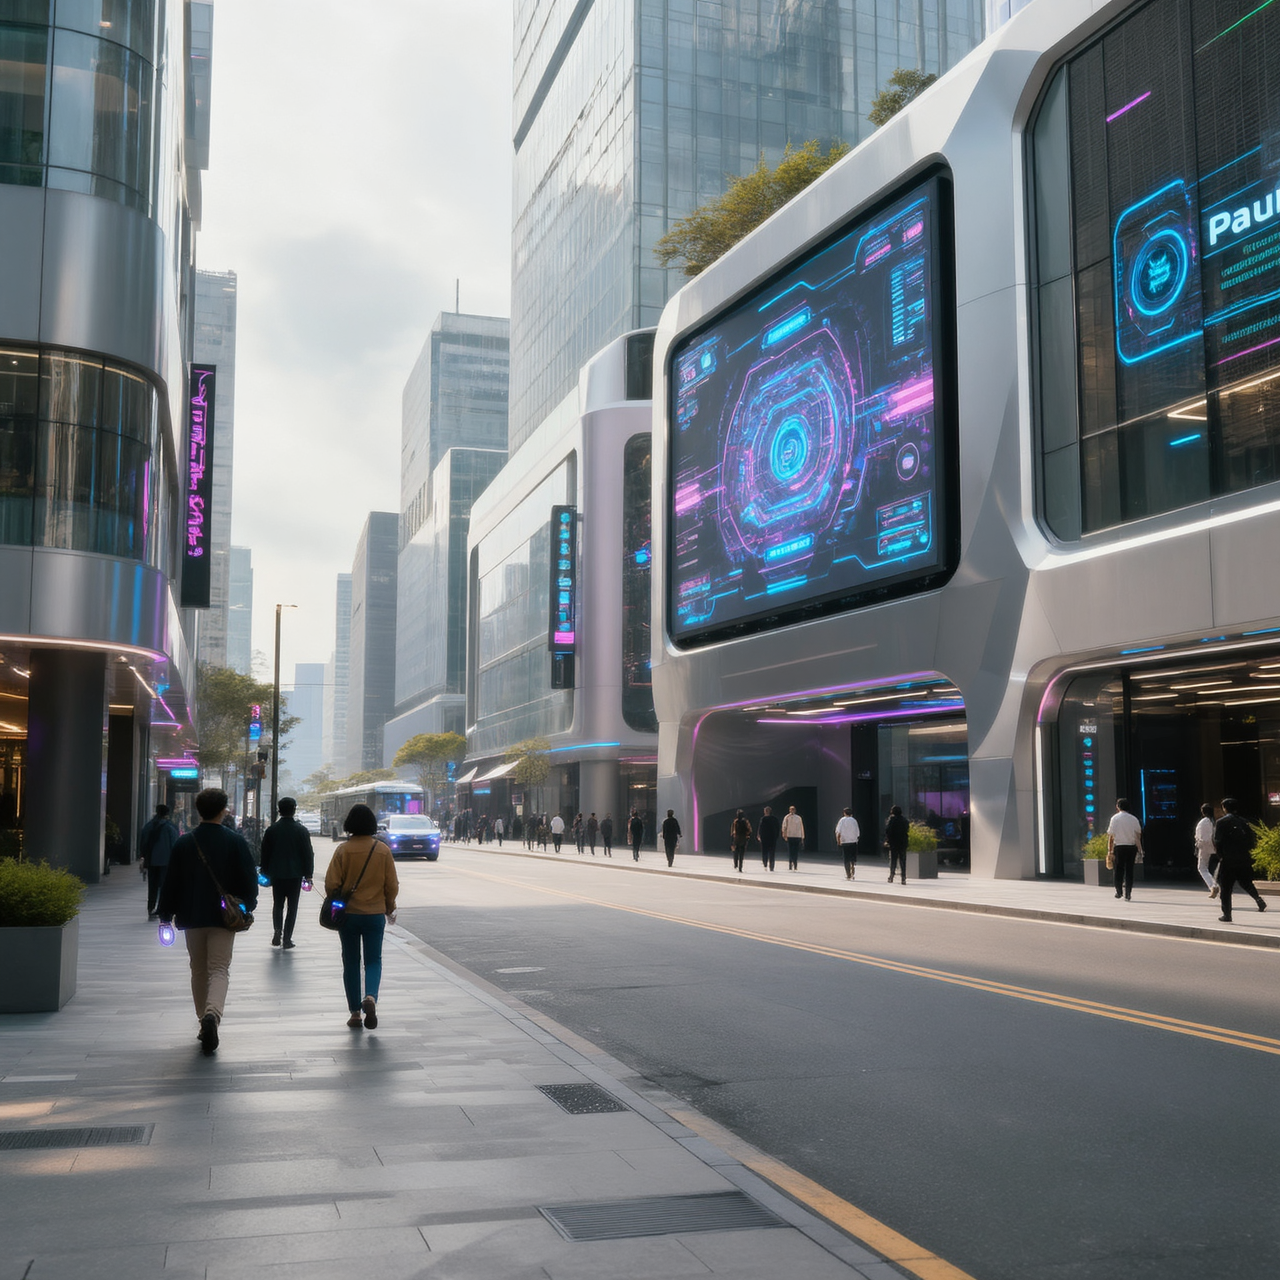
For these examples, I set the denoise strength to 0.5 to make the changes more noticeable. The “Before” image is the input, the “After” image is the output.
Shot: close-up portrait, slight low angle, 85mm lens
Subject: same woman, stronger eye contact, slightly wind-blown hair, more defined makeup
Setting: same park background but darker tones
Lighting: dramatic side lighting with soft rim light, higher contrast, deeper shadows
Style: cinematic portrait photography, richer color depth, sharper facial detail
Shot: wide landscape, 24mm lens
Subject: same valley and mountains
Setting: river reflecting sky, thicker atmospheric depth
Lighting: dramatic golden sunset, volumetric light rays breaking through clouds
Style: cinematic landscape, enhanced contrast, rich warm tones, epic scale feeling
Shot: medium full body, dynamic angle
Subject: same mage, robe flowing more dramatically, stronger magical aura
Setting: ruins partially floating, glowing symbols in air
Lighting: intense magical glow lighting face, dramatic shadows, high contrast
Style: high fantasy cinematic illustration, vibrant colors, glowing particles, epic atmosphere
Shot: wide interior shot, same composition
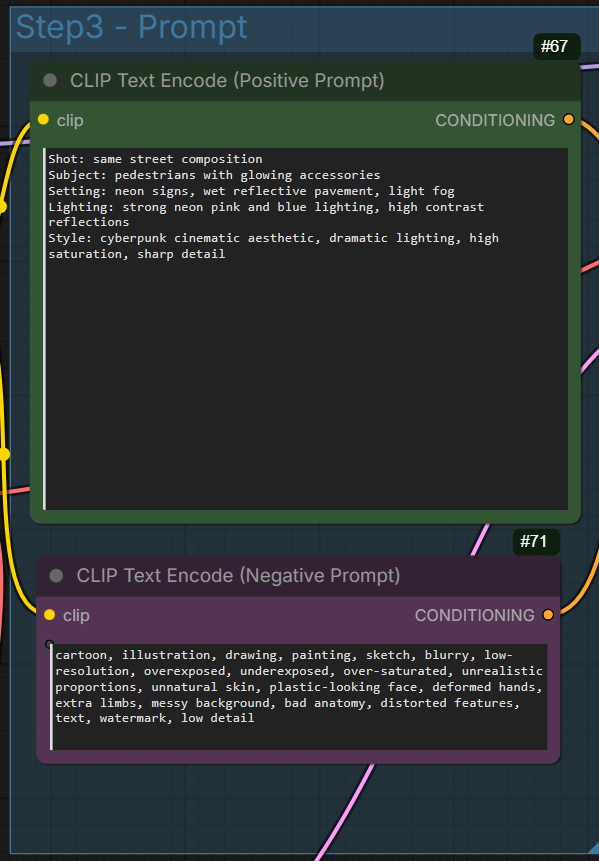
Subject: same living room
Setting: evening ambience, city lights visible through windows
Lighting: warm indoor lamps, deep shadows, cozy contrast lighting
Style: cinematic interior photography, richer shadows, warm color grading
Shot: same street composition
Subject: pedestrians with glowing accessories
Setting: neon signs, wet reflective pavement, light fog
Lighting: strong neon pink and blue lighting, high contrast reflections
Style: cyberpunk cinematic aesthetic, dramatic lighting, high saturation, sharp detail
Conclusion
Z-Image Base GGUF paired with a well-structured ComfyUI image-to-image workflow offers a highly controllable and efficient way to enhance your visuals. By carefully balancing denoise strength, resolution scaling, and post-processing, you can refine details without losing the original intent of the image.
The real advantage of this workflow is control — you’re not regenerating randomly, you’re guiding the model with precision. Once you dial in your preferred settings, it becomes a repeatable pipeline that produces consistent results across different subjects and styles.
If you’re looking for a practical, resource-conscious way to improve image quality while maintaining creative direction, this workflow is absolutely worth integrating into your setup.
Further Reading
Generate Realistic Images with Z-Image-Turbo GGUF in ComfyUI
Leave a Reply