
Most of our desktop computers are Dell computers. You can download the driver cabs for some product lines. At the time of the writing, the following product lines offer driver cabs:
If you’re thinking about purchasing a new GPU, we’d greatly appreciate it if you used our Amazon Associate links. The price you pay will be exactly the same, but Amazon provides us with a small commission for each purchase. It’s a simple way to support our site and helps us keep creating useful content for you. Recommended GPUs: RTX 5090, RTX 5080, and RTX 5070. #ad
- XPS
- Embedded Box PC
- Venue
- Latitude
- OptiPlex
- Precision
I am going to show you how to create a driver package for Latitude E5450.
- Download the cab file following this link.
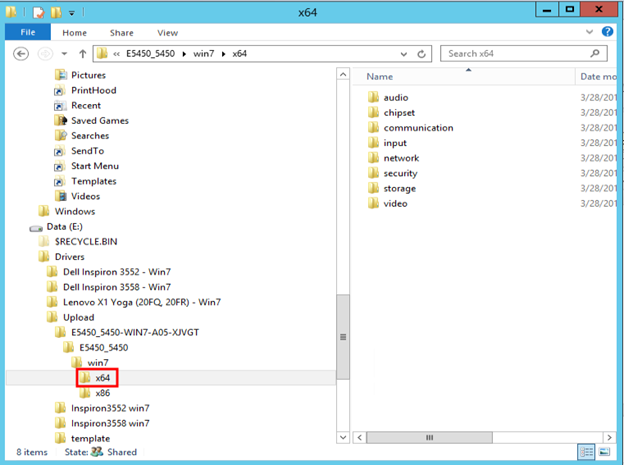
- Unzip the cab file and put them in a directory of your choice. Note that this directory should be part of a share on your server. In this example, Drivers is a share on the server, so the full path to the directory is \\myserver\Drivers\Upload\E5450_5450-WIN7-A05-XJVGT\E5450_5450\win7\x64 .
- Open System Center Configuration Manager and go to Software Library, expand Operating Systems and click on Drivers. Click on Import Driver.

- Enter the path to the extracted drivers in step 2. This step can take a long time.
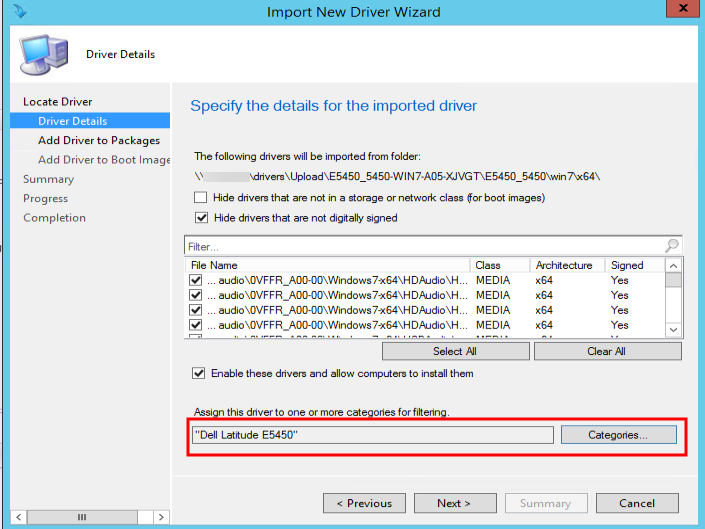
- Â Click on Categories to set the category. Create a new category if the category is not created. Click on Next.
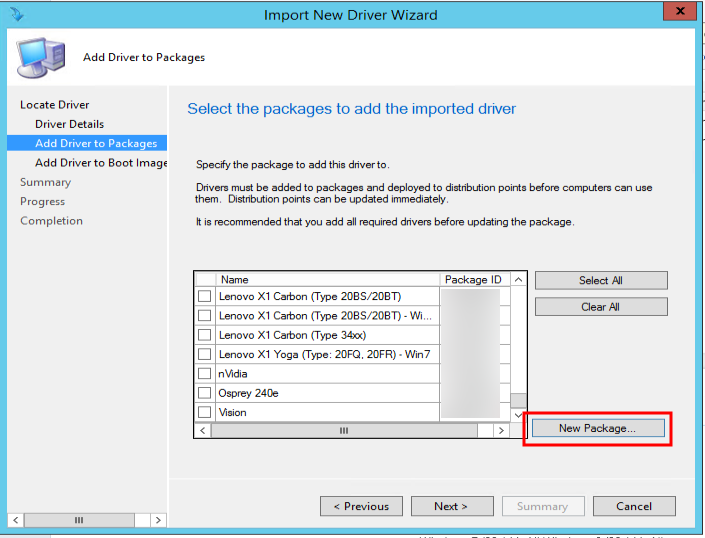
- Click on New Package to create a new package if it’s not created already.
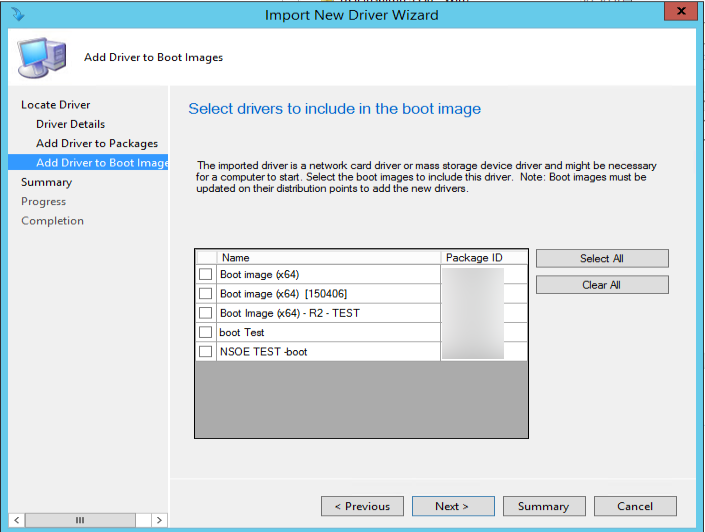
- Select the boot image you want to change and click on Next to continue. If you don’t want to update the boot image, you do not have to do anything here.
- Click on Next to continue.

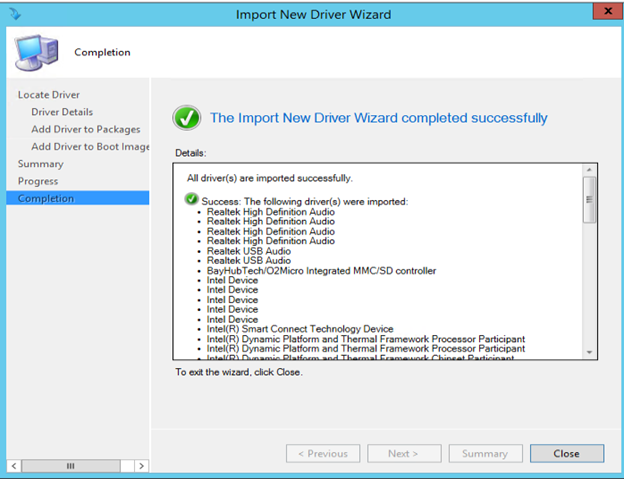
- Click on Close to finish the wizard.
Notes:
- If the drivers failed to be added to the Driver Package, you will have to add them manually to the package.
- After the import is done, review the driver package. Sometimes, the drivers are added multiple times. You can delete the duplicates.

Leave a Reply