
Welcome to the world of cutting-edge AI innovation! In this guide, we will walk you through the process of installing SDXL Turbo, the latest breakthrough in text-to-image synthesis. Developed using the groundbreaking Adversarial Diffusion Distillation (ADD) technique, SDXL Turbo enables real-time generation of high-fidelity images from textual inputs in a single step.
If you’re thinking about purchasing a new GPU, we’d greatly appreciate it if you used our Amazon Associate links. The price you pay will be exactly the same, but Amazon provides us with a small commission for each purchase. It’s a simple way to support our site and helps us keep creating useful content for you. Recommended GPUs: RTX 5090, RTX 5080, and RTX 5070. #ad
Before we dive into the installation process, it’s essential to note that SDXL Turbo, at this stage, is not intended for commercial use. This release is geared towards researchers, developers, and enthusiasts eager to explore the capabilities of this state-of-the-art model.
In this guide, we will provide you with step-by-step instructions, ensuring a smooth installation experience. Whether you’re a seasoned AI practitioner or a curious enthusiast, follow along to unlock the potential of SDXL Turbo and witness the power of Adversarial Diffusion Distillation in action.
Before we proceed, make sure to check the system requirements and prerequisites outlined in the official documentation. Now, let’s embark on the journey of installing SDXL Turbo and bring the future of text-to-image synthesis to your fingertips!
Requirement
- A working ComfyUI installation – https://github.com/comfyanonymous/ComfyUI
- ComfyUI Manager – https://github.com/ltdrdata/ComfyUI-Manager
- Nvidia GPU with 10GB VRAM or higher – 4070, 4080, 4090
Installation
- Start ComfyUI.
- Download this json file, and open it using ComfyUI.
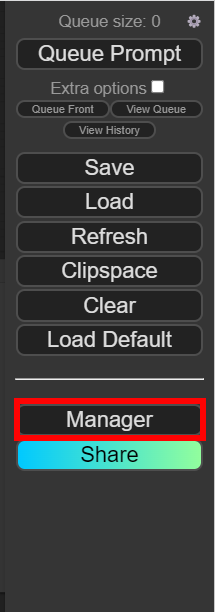
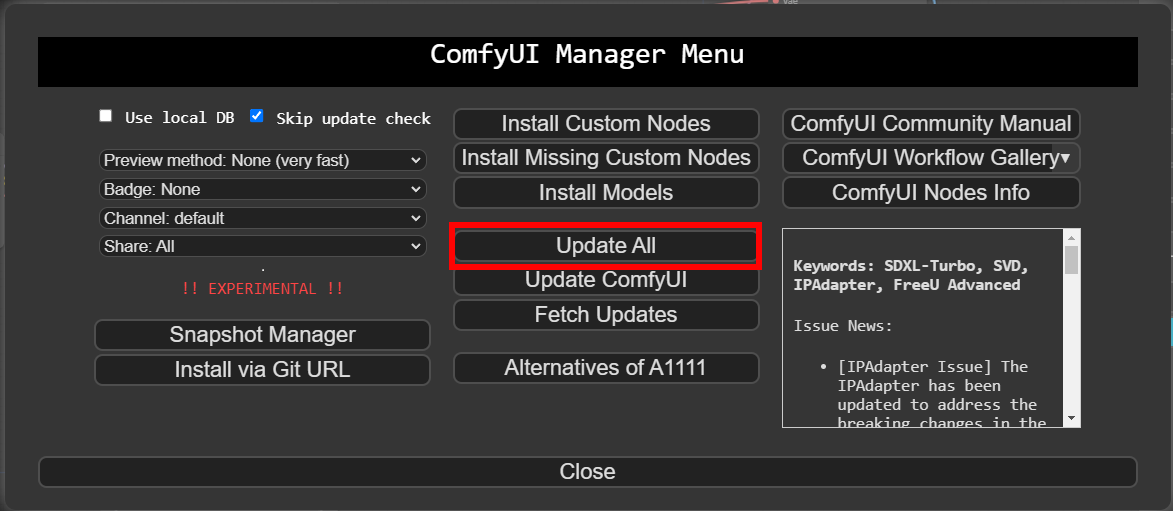
- Click on Manager on the ComfyUI windows.
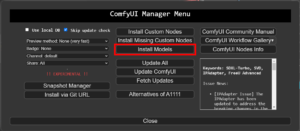
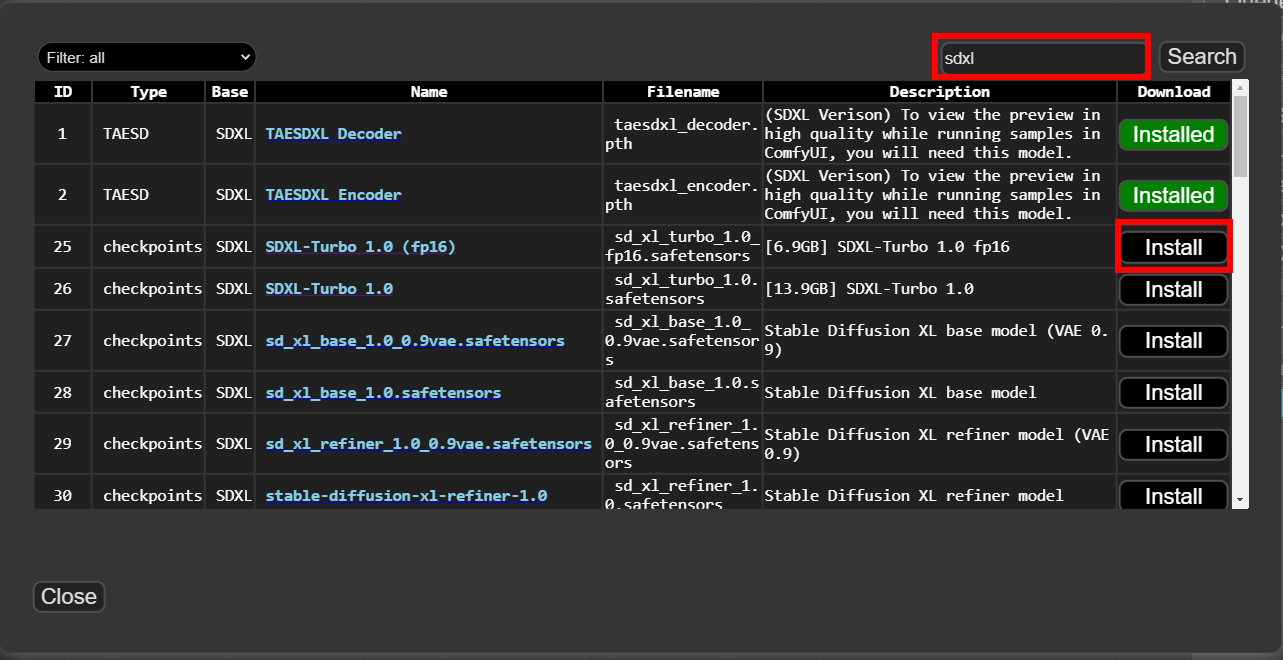
- Click on Install Models on the ComfyUI Manager Menu.
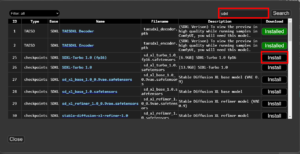
- Search for sdxl and click on Install for the SDXL-Turbo 1.0 (fp16). If you don’t see this option, please click on Update All on the ComfyUI Manager Menu. Wait for the installation to be done and close the window.
- Click on Install Missing Custom Nodes and install any missing nodes. Close the window when the installation is done.

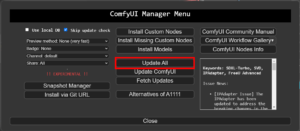
- Click on Update All to update ComfyUI and the nodes.
- Close ComfyUI and restart it


Example
- Start ComfyUI
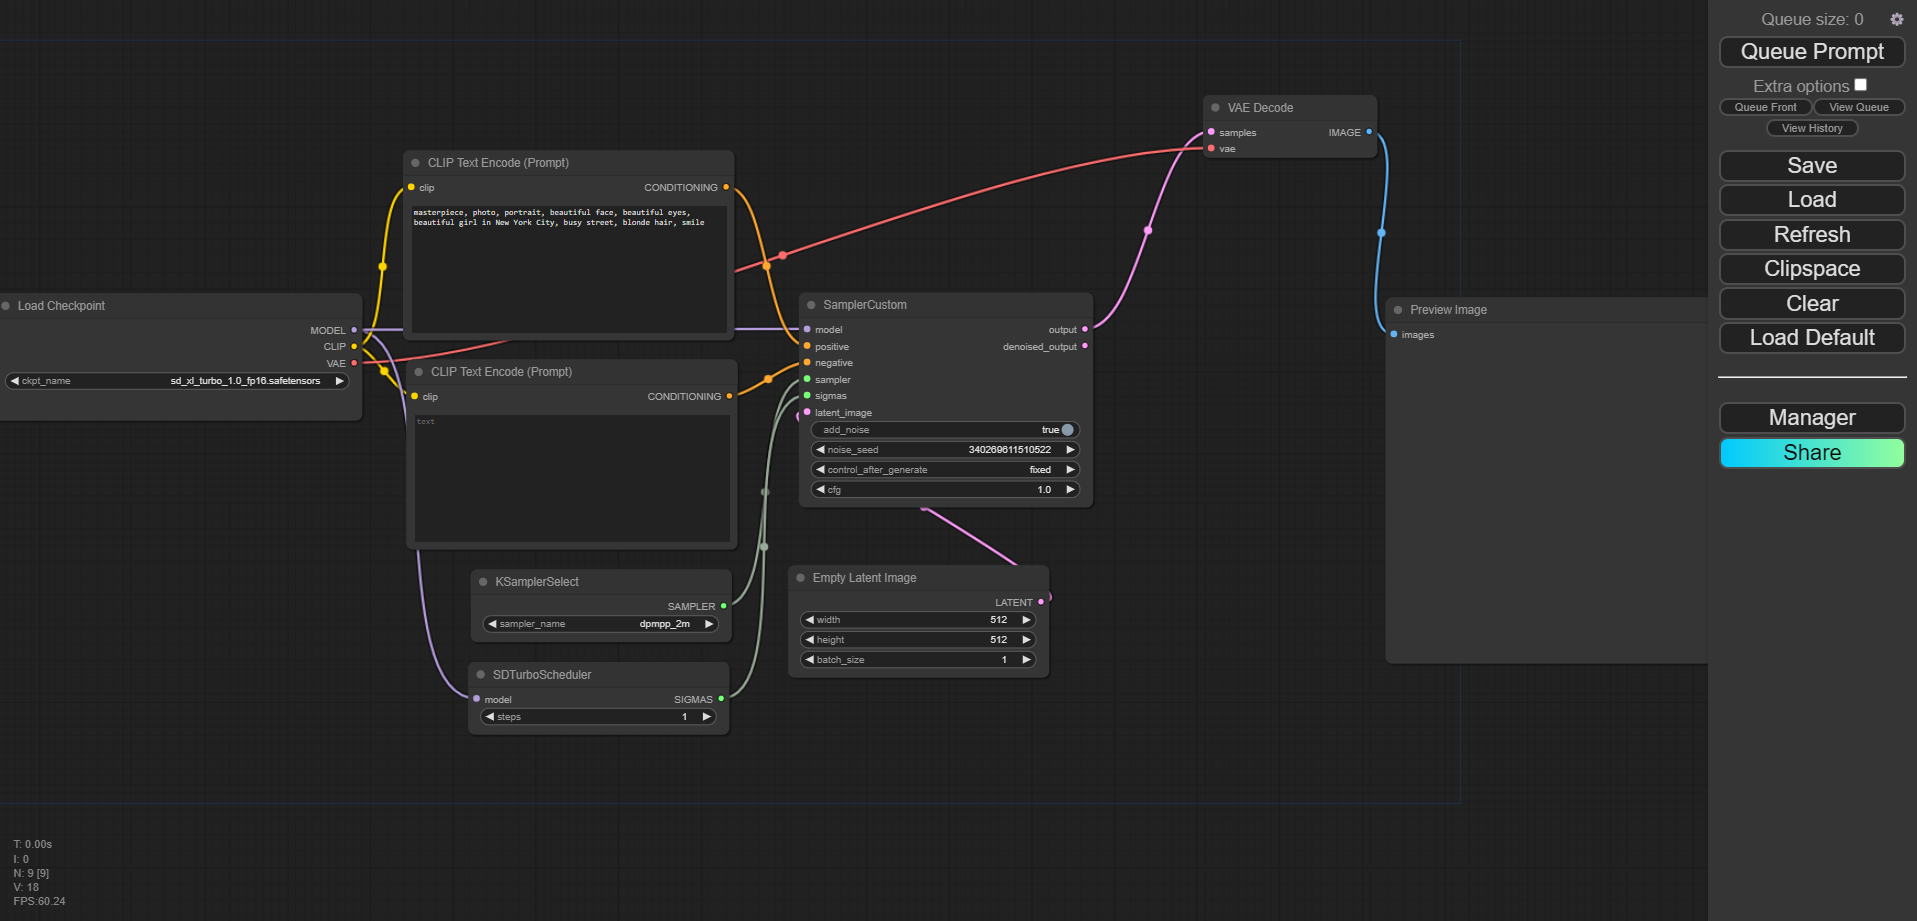
- If the SDXL Turbo workflow is not loaded. Drag and drop the first image of this article to the ComfyUI canvas again.

- Check Extra options and Auto Queue.
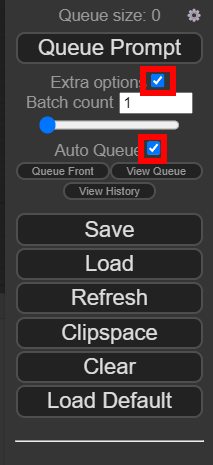
- Click on Queue Prompt to start the process. Change the text for positive prompt and see the image changes in real-time.
- Note that you have to uncheck Auto Queue when you are done. Otherwise, the process is still running when there is no change in the positive prompt.
Notes
- I tried different resolutions, but 512 x 512 is the best.
- Negative prompt does not work, so no need to enter anything in there.
- GPU memory usage is about 9 GB, so a GPU with 12 GB VRAM or above is recommended.
Reference
- Stability AI’s SDXL Turbo announcement.
- Olivio’s YouTube video about SDXL Turbo. The video has a link to different workflows with refiner and upscaler.
Leave a Reply