
Stability AI has introduced a groundbreaking advancement with the release of Stable Video Diffusion. This state-of-the-art generative video model builds upon the success of its predecessor, Stable Diffusion, offering enthusiasts and developers alike a powerful tool for creating dynamic and realistic video content. In this guide, we will walk you through the step-by-step process of installing Stability Video Diffusion, unlocking the potential to harness the next generation of generative AI for video creation.
If you’re thinking about purchasing a new GPU, we’d greatly appreciate it if you used our Amazon Associate links. The price you pay will be exactly the same, but Amazon provides us with a small commission for each purchase. It’s a simple way to support our site and helps us keep creating useful content for you. Recommended GPUs: RTX 5090, RTX 5080, and RTX 5070. #ad
Requirement
- Miniconda (or Anaconda) – https://docs.conda.io/projects/miniconda/en/latest/miniconda-install.html
- Git – https://git-scm.com/downloads
- NVidia GPU – I recommend RTX 3090 or RTX 4090. I used a RTX 3090 in this guide.
Installation
- Open an Anaconda Prompt and change directory to where you want to install Stability Video Diffusion.
- Type the following in the Anaconda Prompt to clone the repository.
git clone https://github.com/Stability-AI/generative-models.git
- Modify this file generative-models\scripts\demo\streamlit_helpers.py . Search lowvram_mode and change it to True.
lowvram_mode = True
- Copy this file video_sampling.py from the previous directory to the main directory.
- Create a checkpoints directory under generative-models.
- Download the SVD (Stability Video Diffusion) checkpoints from the following link and put them in the checkpoints directory. The file is called svd.safetensors. There is also a svd_image_decoder.safetensors file that you can try. These two checkpoints are for generation of 14 frames videos.
https://huggingface.co/stabilityai/stable-video-diffusion-img2vid/tree/main - If you want to generate a longer video, download the two checkpoints from the following link.
https://huggingface.co/stabilityai/stable-video-diffusion-img2vid-xt/tree/main - Under the Anaconda Prompt, change directory to the generative-models directory.
cd generative-models
- Create an environment for SVD and activate it.
conda create -n SVD python=3.10.11

conda activate SVD
- Install PyTorch.
pip install torch==2.0.1 torchvision torchaudio --index-url https://download.pytorch.org/whl/cu118
- Install Triton.
pip install https://huggingface.co/r4ziel/xformers_pre_built/resolve/main/triton-2.0.0-cp310-cp310-win_amd64.whl
- Install the rest of the required modules.
pip install -r requirements/pt2.txt

pip install .
Example
- Open an Anaconda prompt and change directory to where you downloaded generative-models.
- Activate the environment.
conda activate SVD
- Type the following to run streamlit.
streamlit run video_sampling.py
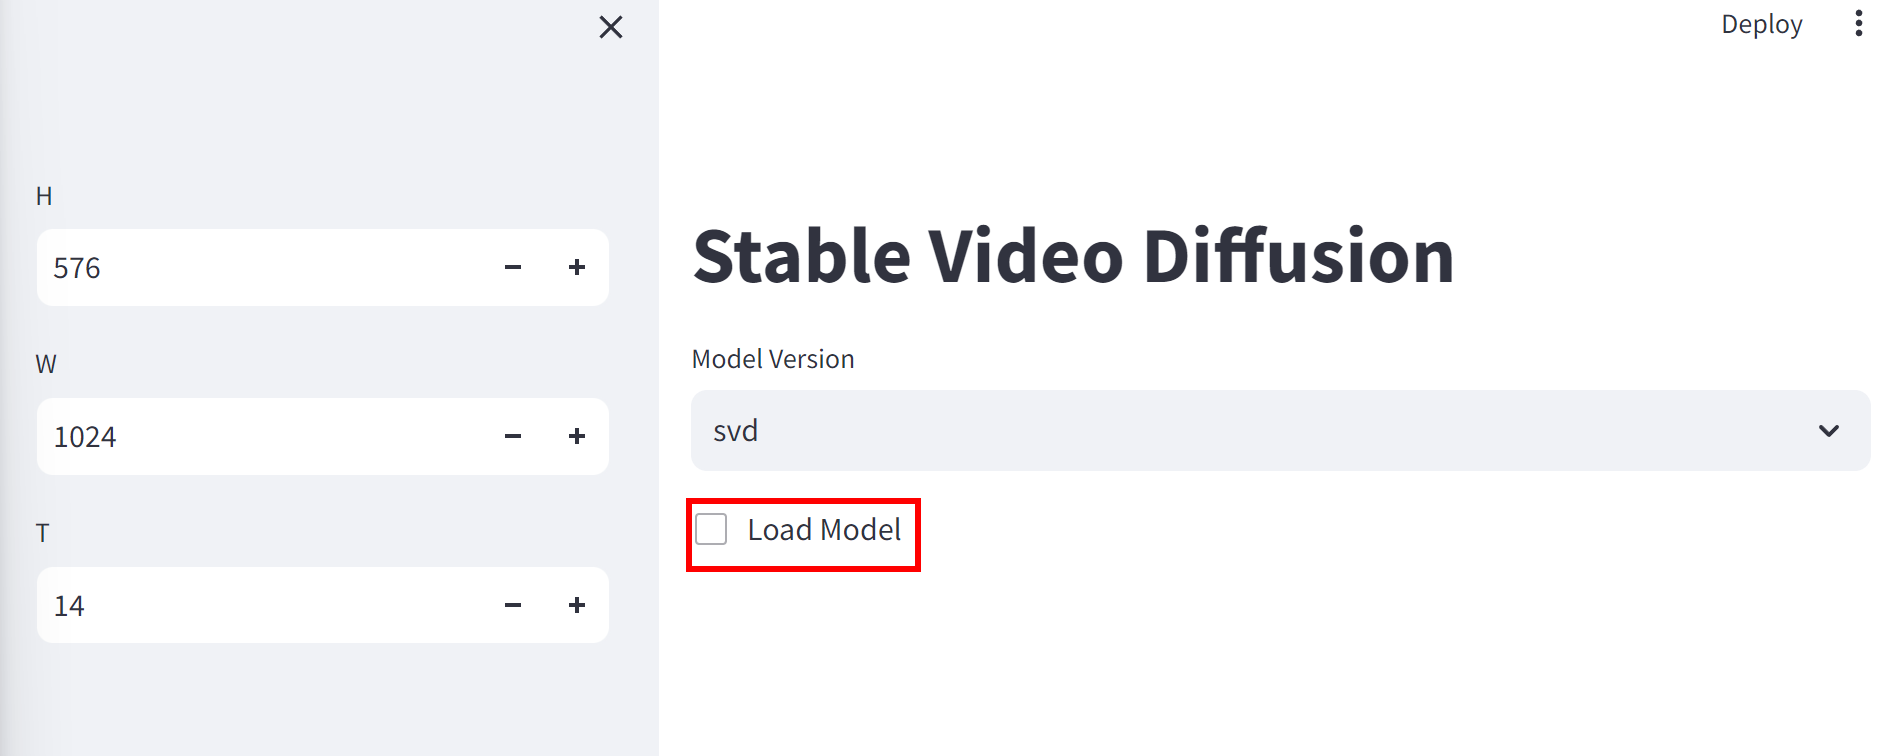
- A browser window should open. Select a model and check Load model. Note that it takes a while to load a model. You might see a TypeError message, but it’s Ok.

- Drag a drop an image that is 576 x 1024 to the input area.
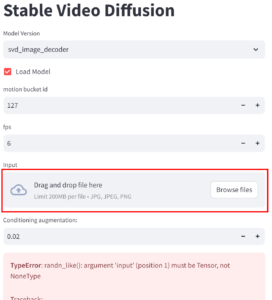
- Adjust the parameters if needed and click on Sample to generate a video. Once it’s done, the output is under outputs\demo\vid\svd\samples if you use the svd model
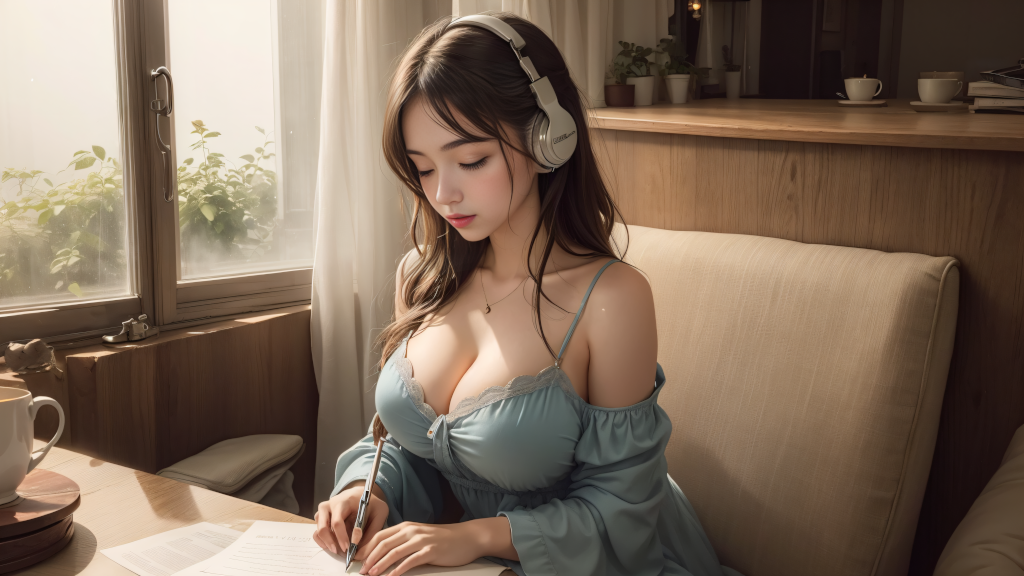
Sample Input

Sample Output

Notes
- The following resolutions work: 576 x 1024, 1024 x 576, 576 x 768, and 768 x 576.
- Input image does not have to be the exact size. If the aspect ratio matches, the image will be scaled. If the aspect ratio does not match, the image will be scaled and cropped.
- GPU memory usage is about 8 GB for using svd model to generate 14 frames. The usage is about 14GB for using svd-xt model to generate 25 frames.
- I found a nice reddit article comparing some of the parameters. It’s worth a read.
Reference
- My Why AI’s YouTube video.
Leave a Reply