, blonde hair, white bikini, beach")
Latent Couple extension let you determine the region of the latent space that reflects your subprompts. Composable LoRA works with Latent Couple and LoRA so that LoRA’s scope of influence is limited to a specific subprompt. This article demonstrates the usage of these two extensions on Automatic1111’s Web UI.
If you’re thinking about purchasing a new GPU, we’d greatly appreciate it if you used our Amazon Associate links. The price you pay will be exactly the same, but Amazon provides us with a small commission for each purchase. It’s a simple way to support our site and helps us keep creating useful content for you. Recommended GPUs: RTX 5090, RTX 5080, and RTX 5070. #ad
Prerequisite
Before you follow the instructions of this article, you need to have a working Automatic1111’s Web UI installation. You also need the Additional Networks(LoRA) and ControlNet extensions. If you don’t have those two extensions, please see my previous articles(LoRA, ControlNet). ControlNet is optional, but I found it invaluable in composing the picture. Without it, the output is quite random.
Enable the Extensions
- Click on the Extension tab and then click on Install from URL.
- Enter https://github.com/ashen-sensored/stable-diffusion-webui-two-shot.git in the URL box and click on Install.

- Enter https://github.com/a2569875/stable-diffusion-webui-composable-lora in the URL box and click on Install.
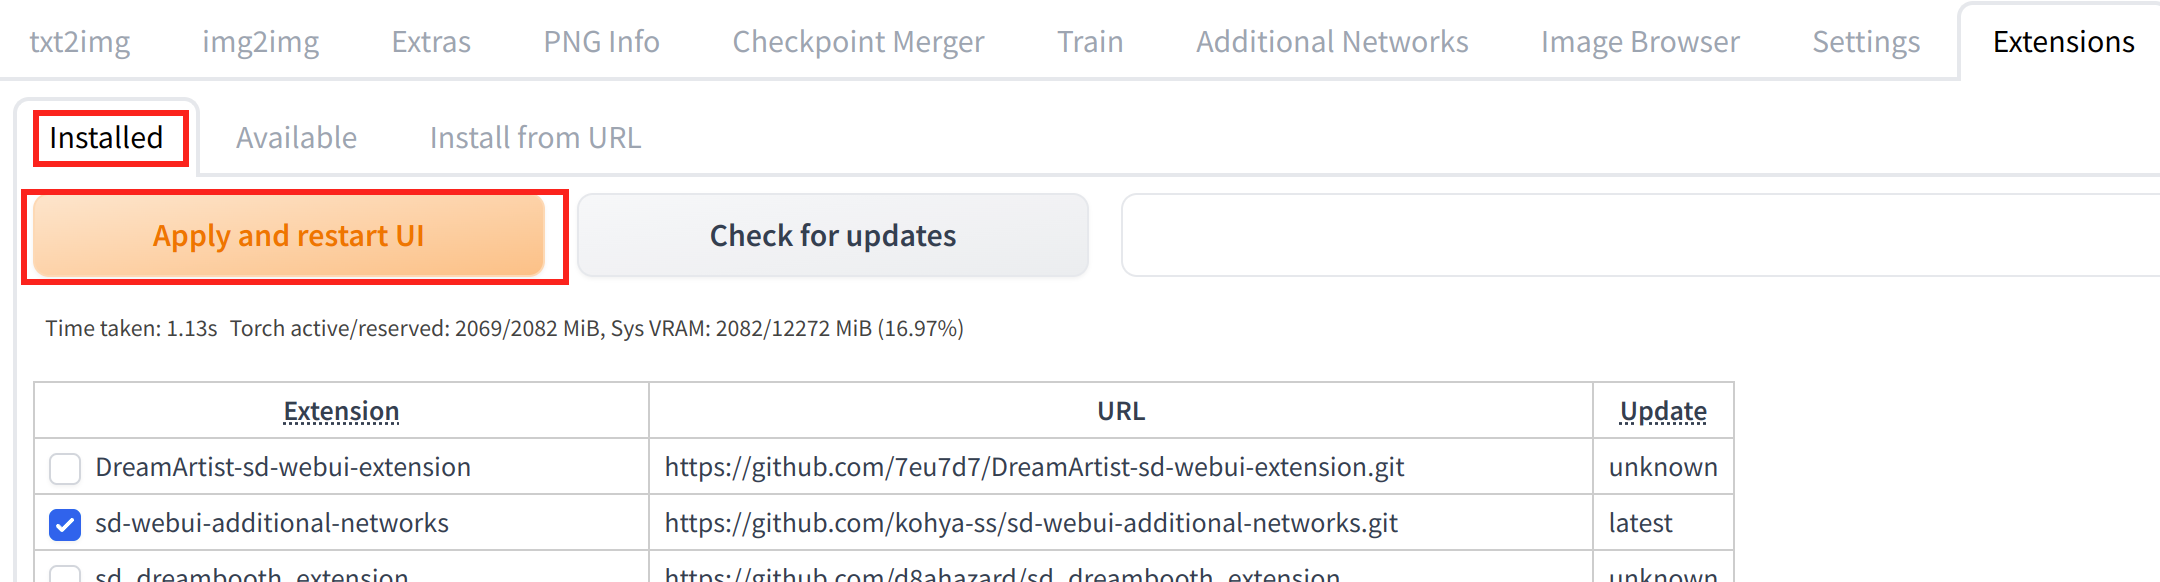
- Click on Installed and click on Apply and restart UI.

- Restart webui.

Example
- I am going to use a model called Lunar Diffusion. If you don’t have it, you can download it here.
- Two LoRA models are used. EVA Asuka and Wowifier. These are just for demonstration. You can use any LoRA models of your choice.
- Click on txt2img.
- Enter the following in the prompt (if you save the LoRA models under different file names, change them accordingly):
detailed, trending on artstation, beach,
AND
an award winning photo of a (beautiful woman:1.1), blonde hair, white bikini, beach, detailed, trending on artstation, <lora:evaAsuka_v10:0.5>
AND
an award winning photo of a (beautiful woman:1.1), ginger hair, black bikini, beach, detailed, trending on artstation, <lora:wowifier_v2:0.5>
- Note that the prompt is separated into 3 subprompts. The subprompts are connected with the word “AND”. The first subprompt is for the background. The second subprompt is for the left side of the canvas and the third subprompt is for the right side of the canvas.
- Enter the following in the negative prompt:
black and white, cartoon, 3d, (disfigured), (bad art), (deformed), (poorly drawn), (extra limbs), strange colours, blurry, boring, sketch, lacklustre, repetitive, cropped, (split screen:1.25)
- Use these parameters (Everyone’s setup is different, so seed might not be important): Steps: 50, Sampler: DPM++ SDE Karras, CFG scale: 7, Seed: 3866699671, Size: 640×640
- Expand ControlNet, drop a picture of your choice in image box to transfer the pose.

- Configure the ControlNet parameters according to the screenshot above.
- Expand Composable Lora and check Enabled.

- Expand Latent Couple, check Enabled. Click on Rectangular tab. Accept the defaults except change the end at this step to match the steps you set earlier. Click on Visualize to see the 3 rectangles represent 3 regions. Remember our prompt is separated into 3 subprompts. The first subprompt describes the whole canvas and the weight is 0.2. The second subprompt describes the left half of the canvas and the weight is 0.8. The third subprompt describes the right half of the canvas and the weight is 0.8. You can change the weights in the Weights box if you want.

- Finally, click on Generate to generate the image.


In this example, we show you how to divide the canvas into two halves and use a subprompt for each area. If you want to divide the canvas into 3 equal parts, you can do so by following the parameters in this screenshot.

Note that I found that some models work better with these two extensions, while others don’t work quite well. Also, when you use LoRA models, the generated images are not quite the same when you don’t use these two extensions. You might need to modify your prompts for better results with LoRA models.
Very nice. However, the composable lora extension linked here is obsolete, broken and replaced by this one: https://github.com/a2569875/stable-diffusion-webui-composable-lora
Thanks for letting me know.