
We have several Windows 2016 servers for data backup. As with any data backup, there are quite a bit duplicated files on the same volume. Windows 2016 introduced a new role called Data Deduplication to help you solve the problem.
If you’re thinking about purchasing a new GPU, we’d greatly appreciate it if you used our Amazon Associate links. The price you pay will be exactly the same, but Amazon provides us with a small commission for each purchase. It’s a simple way to support our site and helps us keep creating useful content for you. Recommended GPUs: RTX 5090, RTX 5080, and RTX 5070. #ad
In order to use the role, you have to add it first. Open the Server Manager Dashboard and click on Add roles and features. Follow the instructions until you see the Server Roles screen. Check the Data Deduplication option.
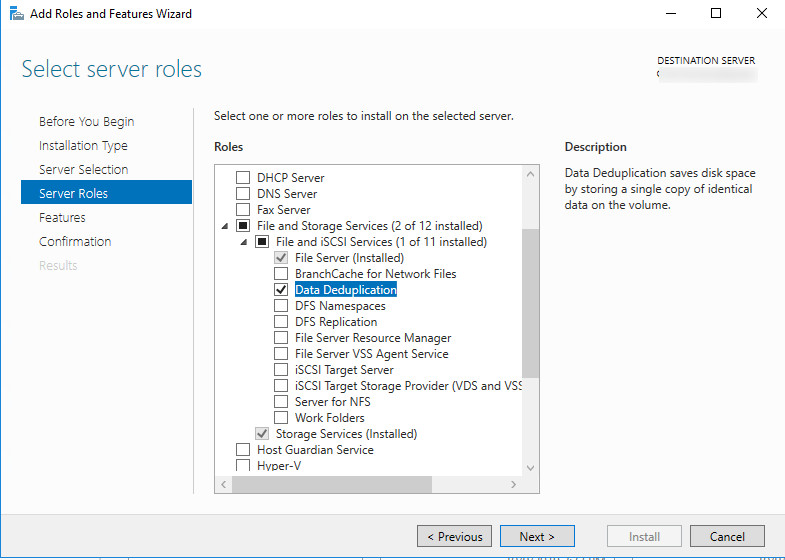
Click on Next and follow the instructions to finish installing the role. You can now configure it using the Server Manager. Click on File and Storage Service and then click on Volumes. Right click on the drive and select Configure Data Deduplication. You can pick the options which suit your need in the next screen. I just use the default settings and it works well for me. You won’t see the Deduplication savings right away. Wait for a few days and check it again. Here is a screenshot of the Deduplication savings on a different server.

You can see that the savings are substantial on some volumes. What is your experience with Data Deduplication? Share it with us in the comment section.
Leave a Reply