
With introduction of ControlNet, we can transfer pose from one image to your image. What if you cannot find an image of a pose you want to make? There are quite a few pose editor extensions which are available to do just that. You can create and edit pose within webui. In this article, I am going to show you how to use a new 3D Open Pose Editor extension.
If you’re thinking about purchasing a new GPU, we’d greatly appreciate it if you used our Amazon Associate links. The price you pay will be exactly the same, but Amazon provides us with a small commission for each purchase. It’s a simple way to support our site and helps us keep creating useful content for you. Recommended GPUs: RTX 5090, RTX 5080, and RTX 5070. #ad
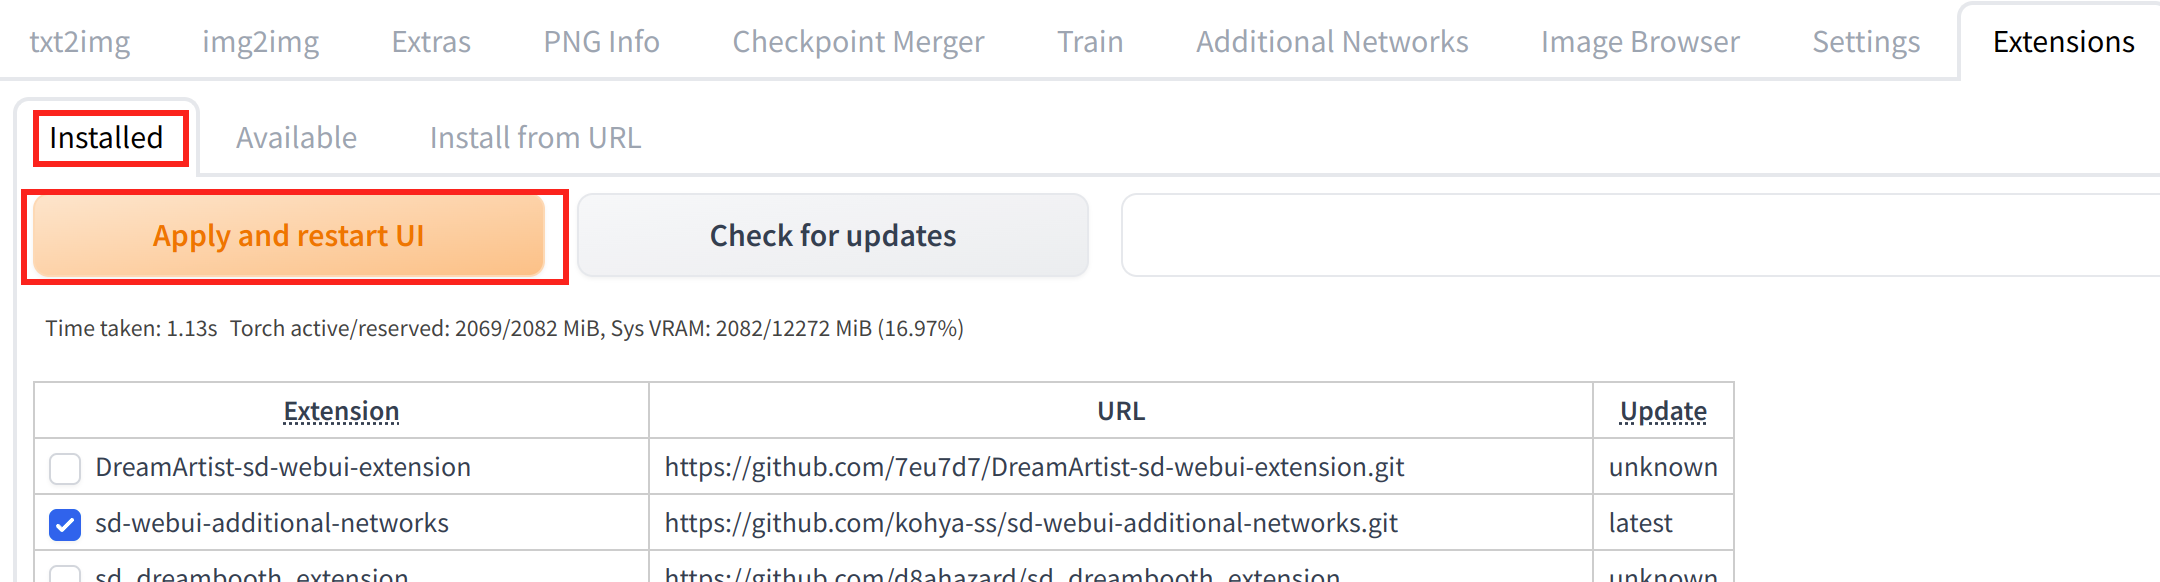
Enable the Extension
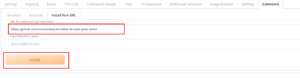
- Click on the Extension tab and then click on Install from URL.
- Enter https://github.com/nonnonstop/sd-webui-3d-open-pose-editor in the URL box and click on Install.
- Click on Installed and click on Apply and restart UI.

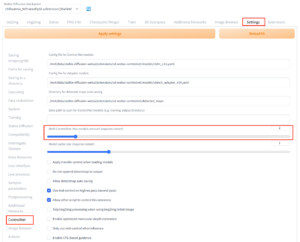
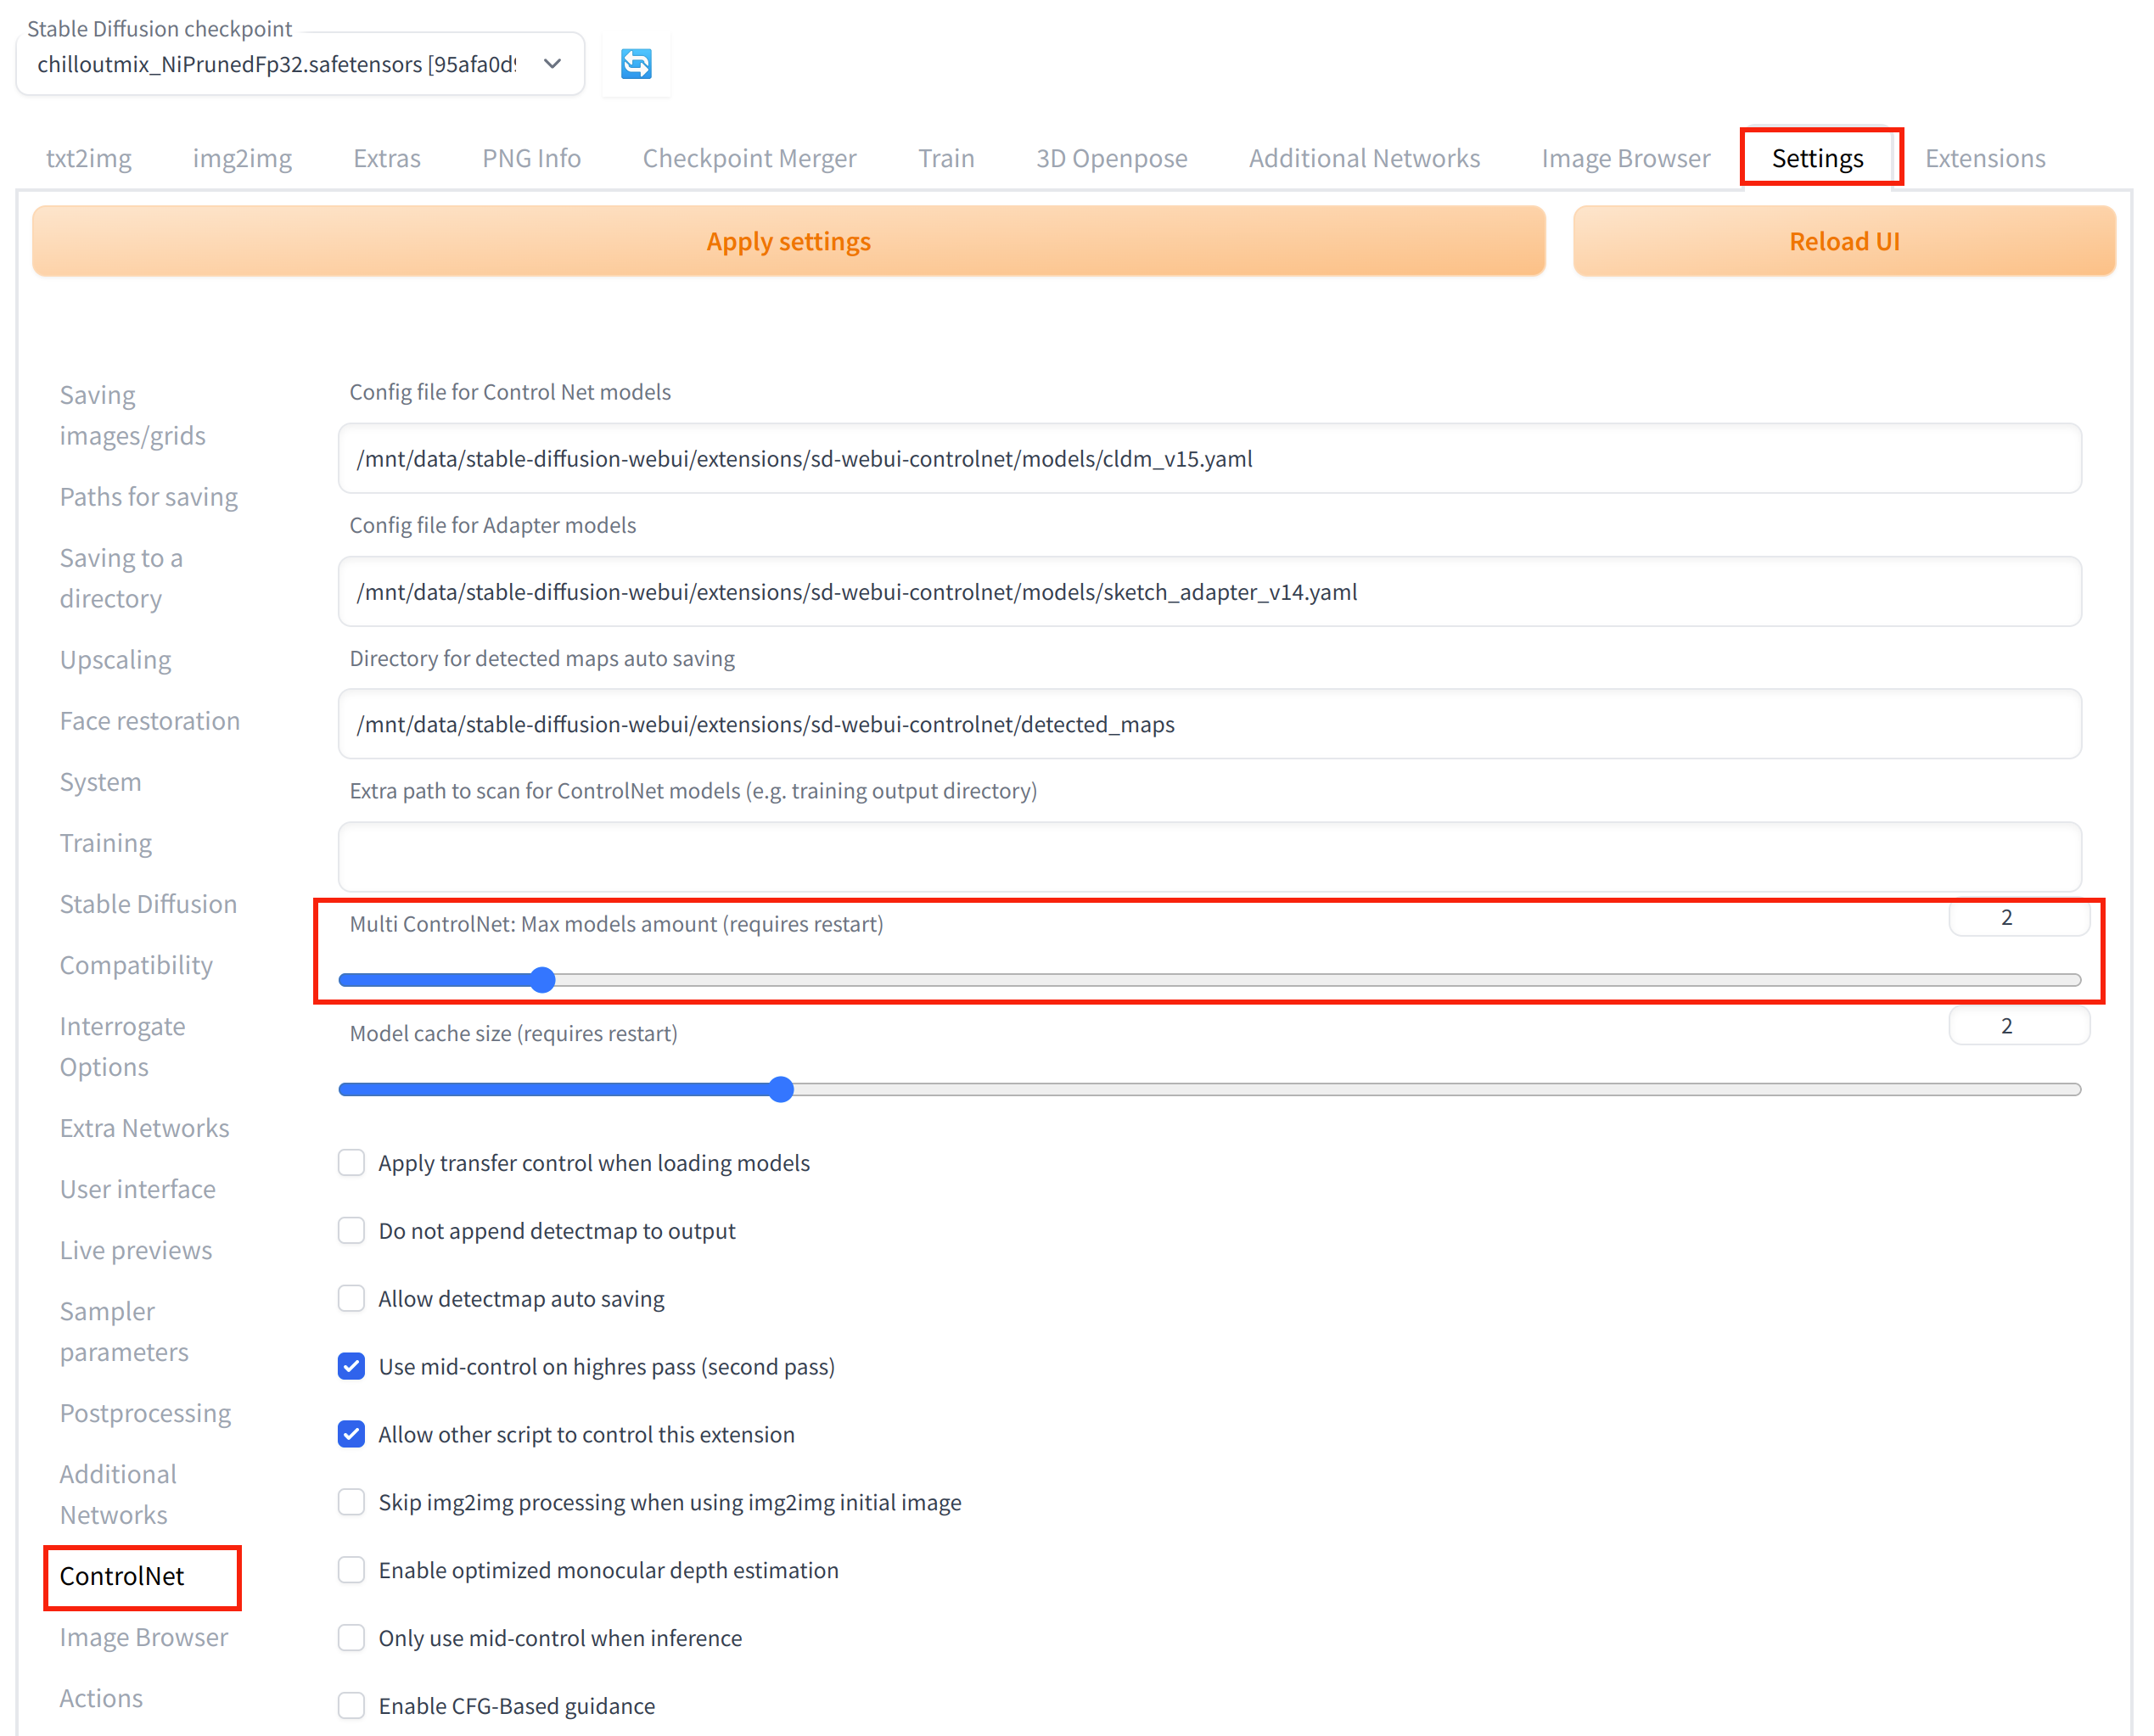
- Before you do the next step, make sure you have enabled ControlNet extension. If you don’t know how to enable ControlNet, please see my previous post. Also, remember to enable Multi-ControlNet support by going to Settings -> ControlNet -> Multi ControlNet. Set the number to 2 for this example. Finally, click on Apply settings.
- Restart webui.

Use the Extension
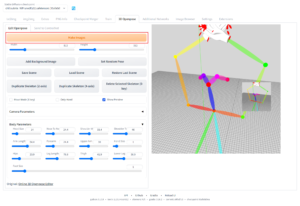
- Click on 3D Openpose, a default skeleton is loaded.

- Some basics about manipulating the view:
- Zoom: Use the wheel on the mouse to zoom in or out. If you only have a touch pad, scroll up and down to zoom.
- Rotate: Left click and hold on an empty spot on the canvas, move the mouse to rotate the view.
- Move: Right click and hold on an empty spot on the canvas. move the mouse to move the view.
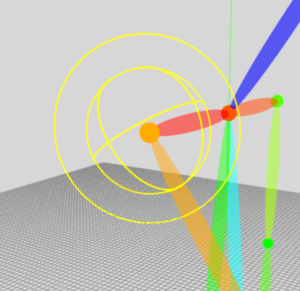
- To edit the pose, click on a joint. You will see a sphere with red, blue, and green curves. Note that there is also a faint yellow circle.
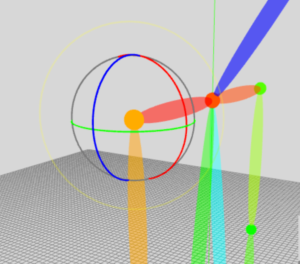
- Move the cursor to the red curve and the red curve turns yellow.
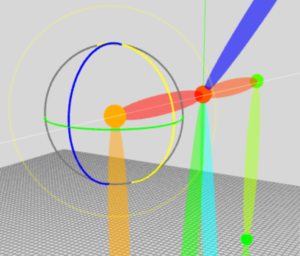
- Left click and hold the mouse button, you can move the mouse to rotate the body part attached to the joint along the selected curve.
- Repeat the process to the blue, and green curves and the yellow circle to achieve the pose you want.
- There is also a free form movement. Move the cursor near the center of the sphere but away from any curves. All the curves and the circle turn to yellow. Left click and hold the mouse button, move the mouse around to rotate the body part freely.
- For hands, zoom in on hand and click on the red dot to edit.

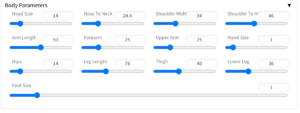
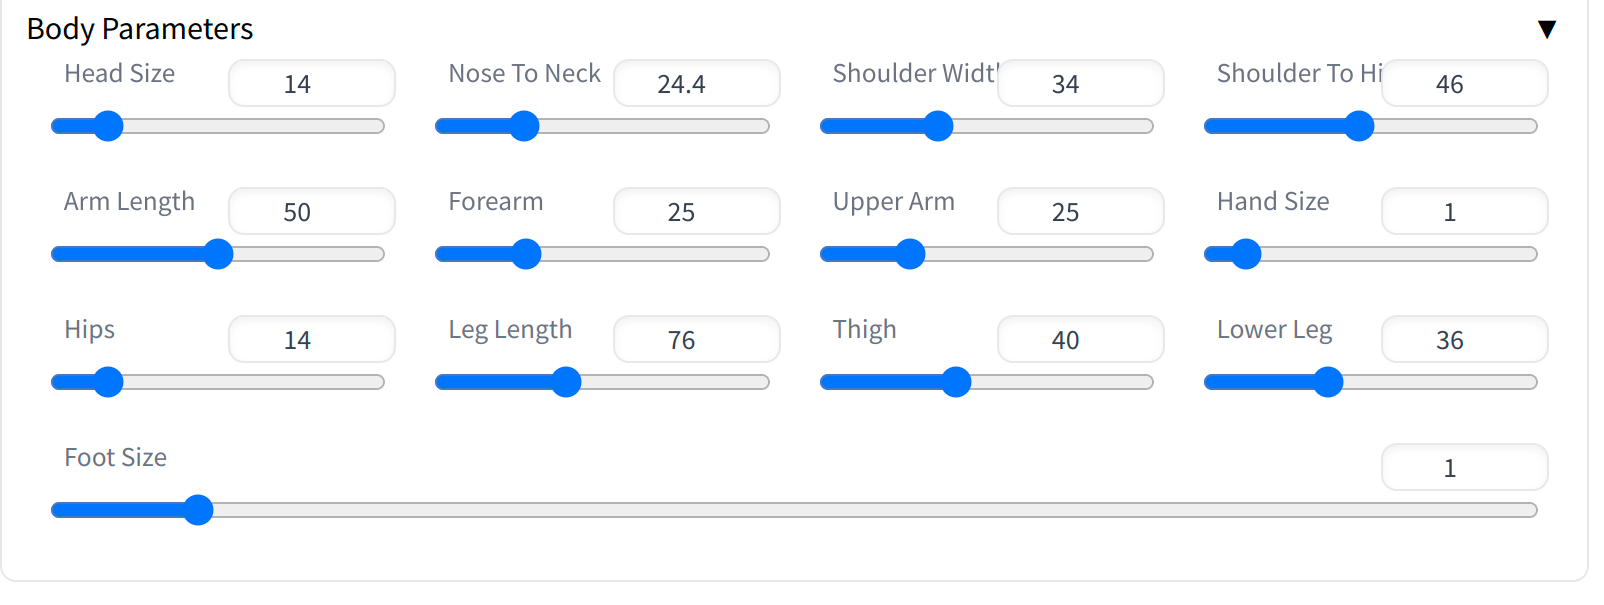
- Note that with any joint selected, the Body Parameters dialog appears. You can adjust the parameters to suit your need.
- If you don’t want to edit the pose by yourself, you can try your luck and let the extension generate a random pose for you by clicking on Set Random Pose.
- If you don’t want to include feet, check Only Hand.
- Adjust the Width and Height to match the size of the image you want to generate.
- When you are done editing the pose, click on Make Images.
- 4 images are created. One for the pose and three for the hands (depth, normal, and canny). Set the pose to ControlNet 0, and set the depth to ControlNet 1. Click on Send to txt2img.

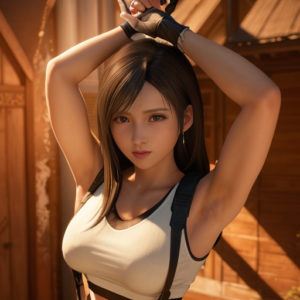
- I am going to use ChillOutMix model with Tifa Lora model as an example. You can find out the parameters on the Tifa Lora model page. Fill out the parameters on the txt2img tab.
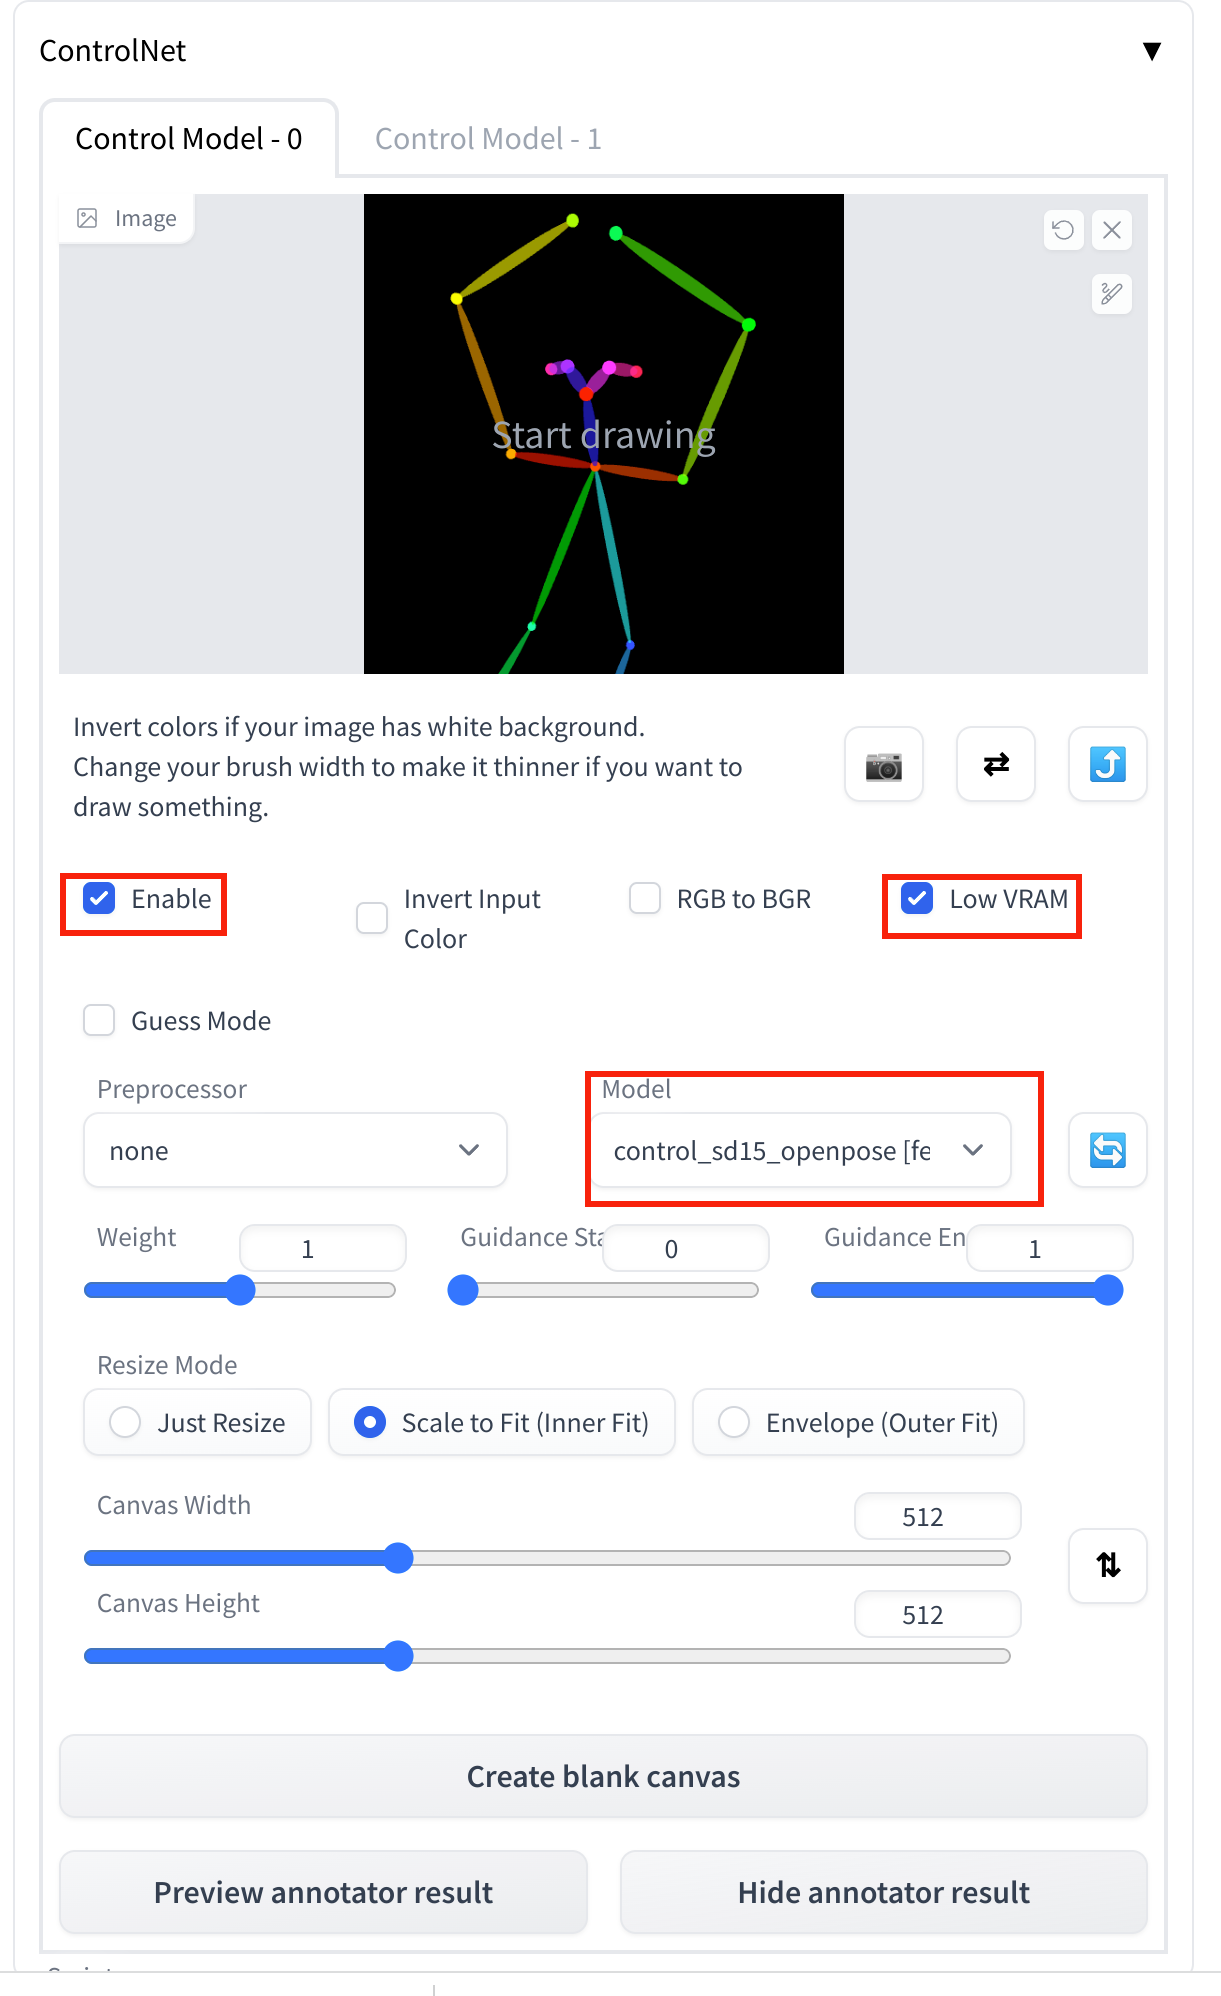
- Expand ControlNet. Under Control Model – 0, check Enable and Low VRAM(optional). Select the control_sd15_openpose Model.
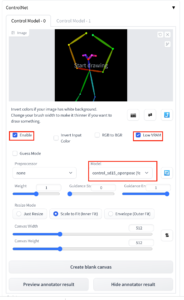
- Click on Control Model – 1. Check Enable and Low VRAM(optional). Select the control_sd15_depth model.

- Finally, click on Generate to generate the image.


My other tutorials:
How to Use LoRA Models with Automatic1111’s Stable Diffusion Web UI
How to Use ControlNet with Automatic1111’s Stable Diffusion Web UI
How to Use ControlNet and gif2gif with Automatic1111’s Stable Diffusion Web UI
How to Use ModelScope text2video with Automatic1111’s Stable Diffusion Web UI
Leave a Reply